前期准备
下载node.js,安装VueCLI
1
2
| npm install -g @vue/cli
vue --version
|
创建项目

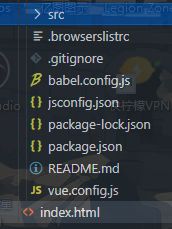
项目结构
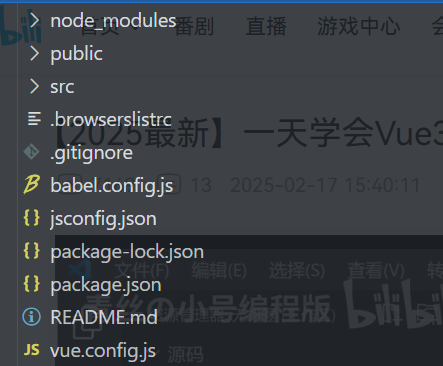
在src下编写代码,其他是配置文件
src/assets:存放静态文件(公共CSS文件,图片)
src/components:公共组件
App.vue:根组件
main.js:主入口文件
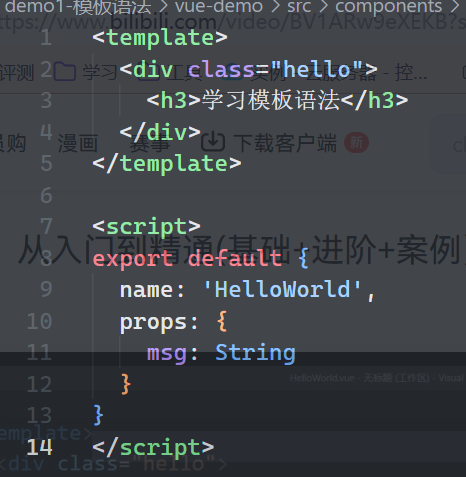
模板语法
1
2
3
4
5
6
7
8
9
10
11
12
13
14
15
| <template>
<div class="hello">
<h3>学习模板语法</h3>
</div>
</template>
<script>
export default {
name: 'HelloWorld',
props: {
msg: String
}
}
</script>
|
数据绑定
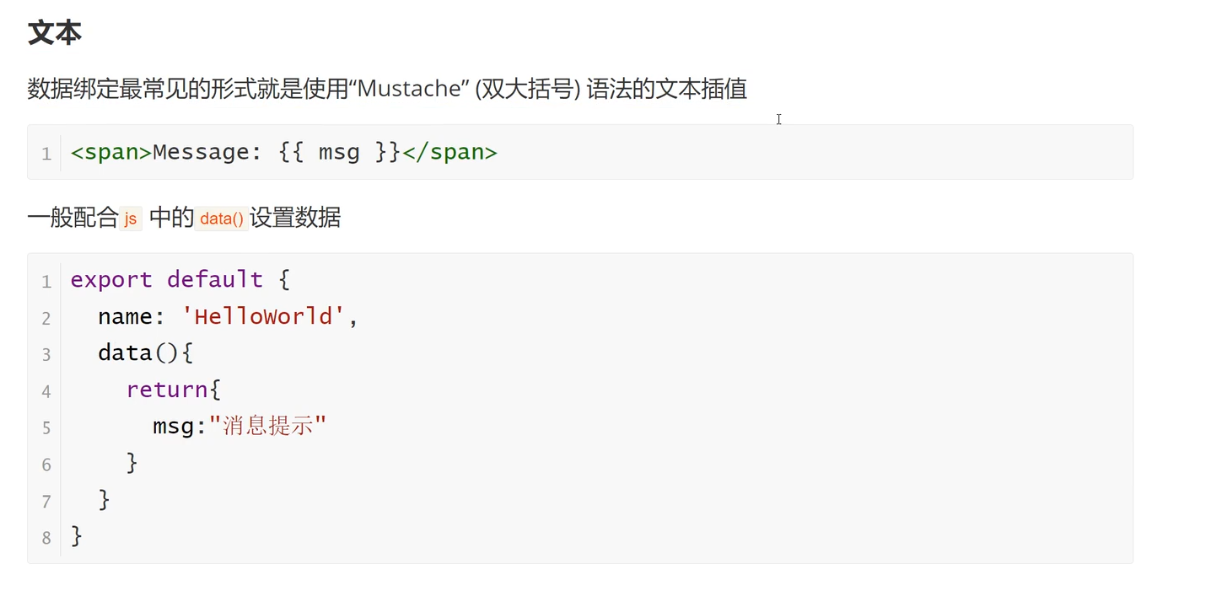
双大括号搭配js中的data()函数,data()返回一个对象型数据
1
2
3
4
5
6
7
8
9
10
11
12
13
14
15
16
17
| <template>
<div class="hello">
<h3>学习模板语法</h3>
<span>{{ message }}</span>
</div>
</template>
<script>
export default {
name: 'HelloWorld',
data(){
return{
message:'study'
}
}
}
</script>
|
结果:

原始HTML
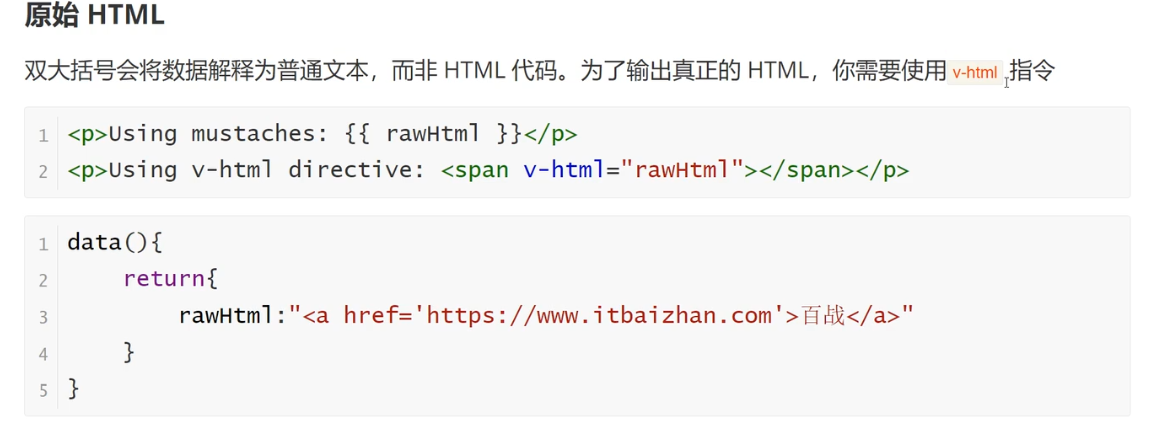
{{}}与v-html区别就好比document.getElementById().innerHTML和document.getElementById().innerText的区别
1
2
3
4
5
6
7
8
9
10
11
12
13
14
15
16
17
18
19
20
| <template>
<div class="hello">
<h3>学习模板语法</h3>
<span>{{ message }}</span>
<span>{{ rawHtml }}</span>
<p>v<span v-html="rawHtml"></span></p>
</div>
</template>
<script>
export default {
name: 'HelloWorld',
data(){
return{
message:'study',
rawHtml:'<a href="https://www.bilibili.com">bilibili</a>'
}
}
}
</script>
|

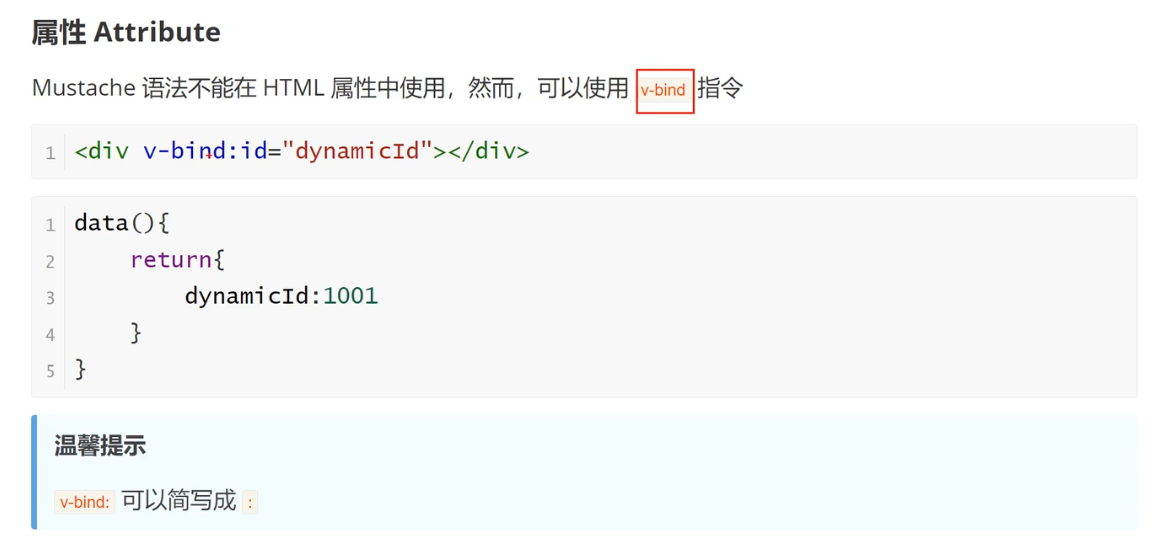
属性Attribute
1
2
3
4
5
6
7
8
9
10
11
12
13
14
15
16
17
18
19
20
21
22
23
| <template>
<div class="hello">
<h3>学习模板语法</h3>
<span>{{ message }}</span>
<span>{{ rawHtml }}</span>
<p>v<span v-html="rawHtml"></span></p>
<span v-bind:id="Id"></span>
<span :id="Id"></span>
</div>
</template>
<script>
export default {
name: 'HelloWorld',
data(){
return{
message:'study',
rawHtml:'<a href="https://www.bilibili.com">bilibili</a>',
Id:114514
}
}
}
</script>
|
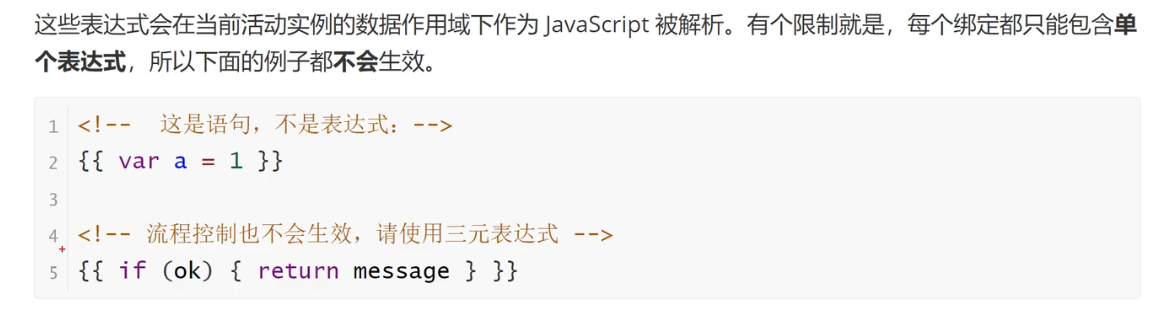
使用JavaScript表达式

1
2
3
4
5
6
7
8
9
10
11
12
13
14
15
16
17
18
19
20
21
22
23
24
25
26
27
| <template>
<div class="hello">
<h3>学习模板语法</h3>
<span>{{ message }}</span>
<span>{{ rawHtml }}</span>
<p>v<span v-html="rawHtml"></span></p>
<span v-bind:id="Id"></span>
<span>{{ flag?"123":"456" }}</span>
<br>
<span>{{ num+10 }}</span>
</div>
</template>
<script>
export default {
name: 'HelloWorld',
data(){
return{
message:'study',
rawHtml:'<a href="https://www.bilibili.com">bilibili</a>',
Id:114514,
flag:true,
num:20
}
}
}
</script>
|
不能在双括号里++ – +=,会引发无限递归,在 Vue 的模板中,每次渲染时都会执行这个表达式,导致 num 的值不断递增

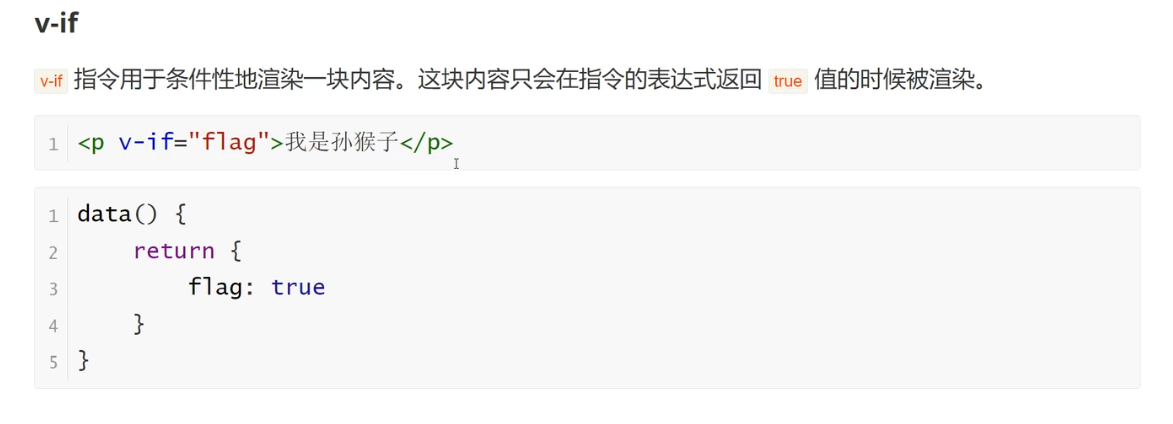
条件渲染
v-if
1
2
3
4
5
6
7
8
9
10
11
12
13
| <template>
<div v-if="flag">你好</div>
</template>
<script>
export default {
data(){
return{
flag:true
}
}
}
</script>
|
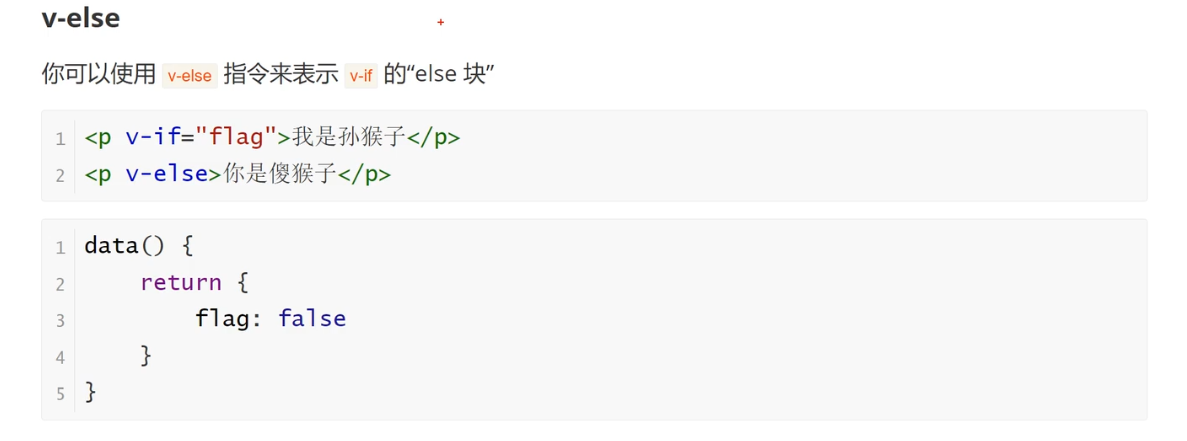
v-else
1
2
3
4
5
6
7
8
9
10
11
12
13
14
| <template>
<div v-if="!flag">你好</div>
<div v-else>不好</div>
</template>
<script>
export default {
data(){
return{
flag:true
}
}
}
</script>
|
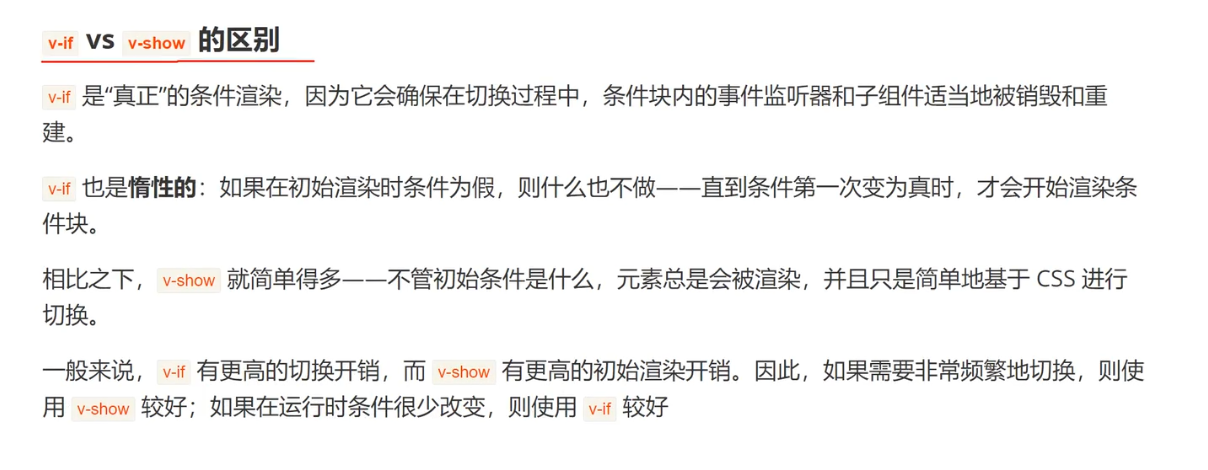
v-show
1
2
3
4
5
6
7
8
9
10
11
12
13
14
15
16
| <template>
<div v-if="!flag">你好</div>
<div v-else>不好</div>
<div v-show="flag">芜湖</div>
<div v-show="!flag">不芜湖</div>
</template>
<script>
export default {
data(){
return{
flag:true
}
}
}
</script>
|
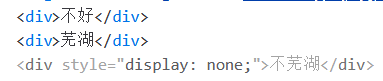
即使!flag为false,不芜湖这句依然存在,只是css样式被替换
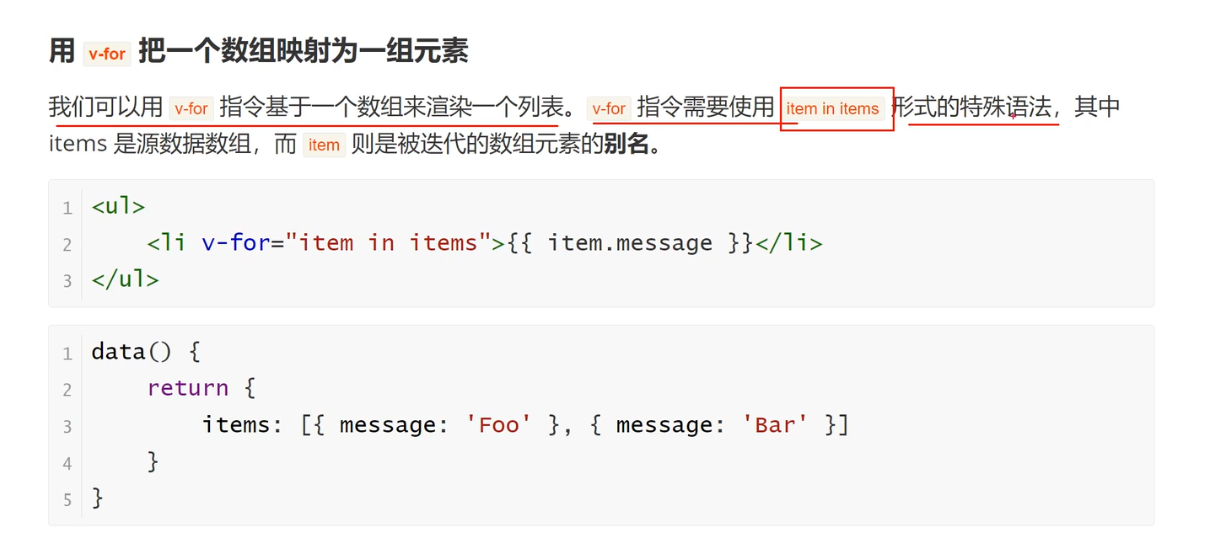
列表渲染
1
2
3
4
5
6
7
8
9
10
11
12
13
14
15
16
17
18
19
| <template>
<li v-for="item in List">
{{ item.message }}
</li>
</template>
<script>
export default {
data(){
return{
List:[
{message:"1"},
{message:"2"},
{message:"3"}
]
}
}
}
</script>
|
维护状态
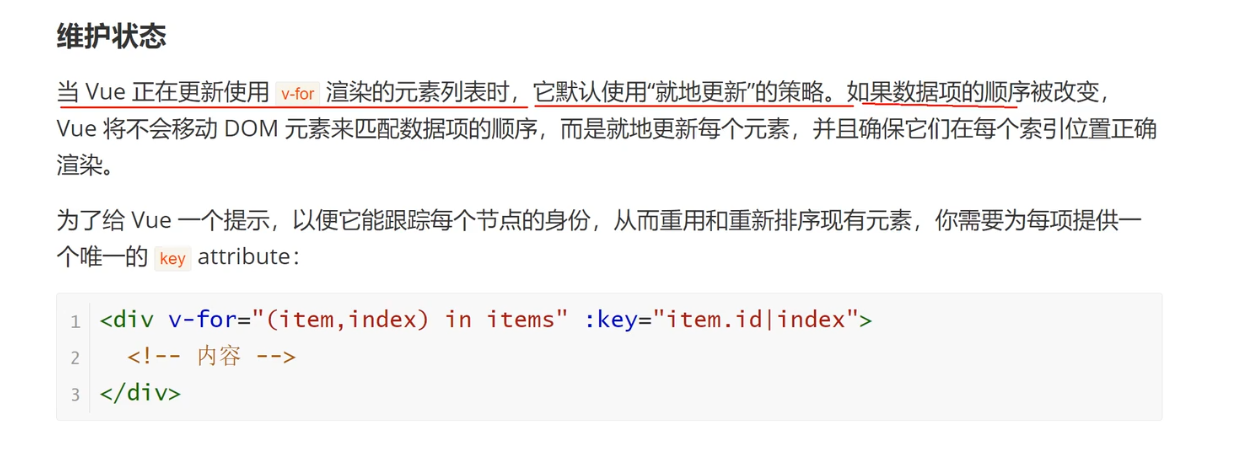
就地更新指的是
1
2
3
4
5
6
7
8
9
10
11
12
13
14
15
16
17
18
19
20
21
22
23
24
25
26
27
28
29
|
<script>
export default {
data(){
return{
List:[
{message:"1"},
{message:"2"},
{message:"3"}
]
}
}
}
</script>
<script>
export default {
data(){
return{
List:[
{message:"1"},
{message:"2"},
{message:"3"},
{message:"4"}
]
}
}
}
</script>
|
增加v-bind:key属性
1
2
3
4
5
6
7
8
9
10
11
12
13
14
15
16
17
18
19
20
| <template>
<li v-for="item in List" :key="item.id">
{{ item.message }}
</li>
</template>
<script>
export default {
data(){
return{
List:[
{id:1,message:"1"},
{id:2,message:"2"},
{id:3,message:"33"},
{id:4,message:"4"}
]
}
}
}
</script>
|
如果数组中元素没有id怎么办,v-for遍历时其实有一个索引index,将index作为key
1
2
3
4
5
6
7
8
9
10
11
12
13
14
15
16
17
18
19
20
| <template>
<li v-for="(item,index) in List" :key="index">
{{ item.message }}
</li>
</template>
<script>
export default {
data(){
return{
List:[
{id:1,message:"1"},
{id:2,message:"2"},
{id:3,message:"33"},
{id:4,message:"4"}
]
}
}
}
</script>
|
事件处理
监听事件
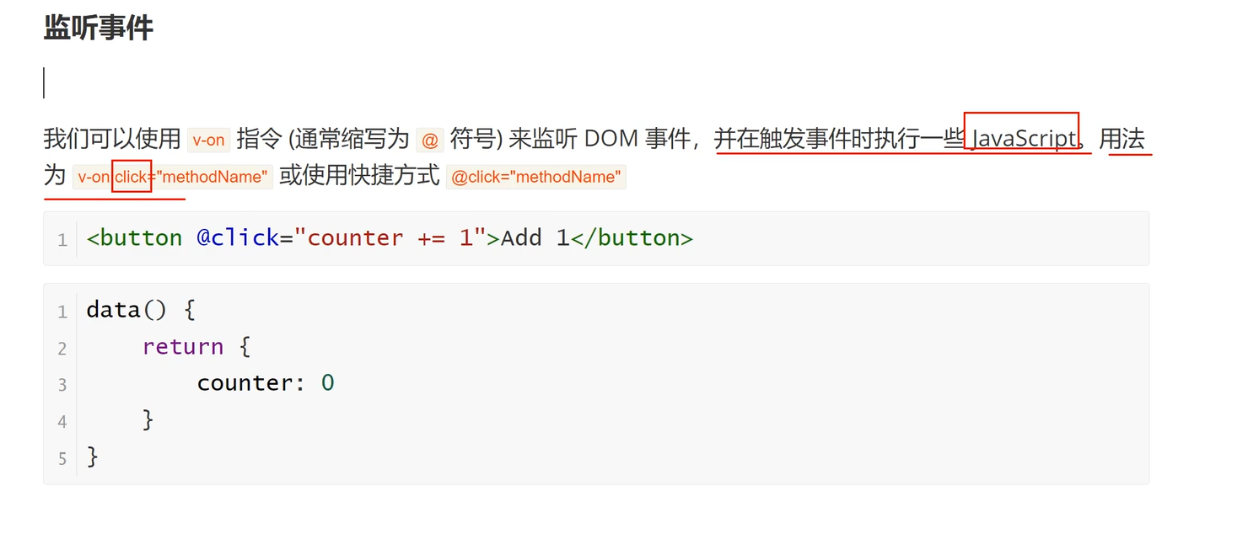
v-on缩写为@
1
2
3
4
5
6
7
8
9
10
11
12
13
| <template>
<button @click="count+=1">{{ count }}</button>
</template>
<script>
export default {
data(){
return{
count:0
}
}
}
</script>
|
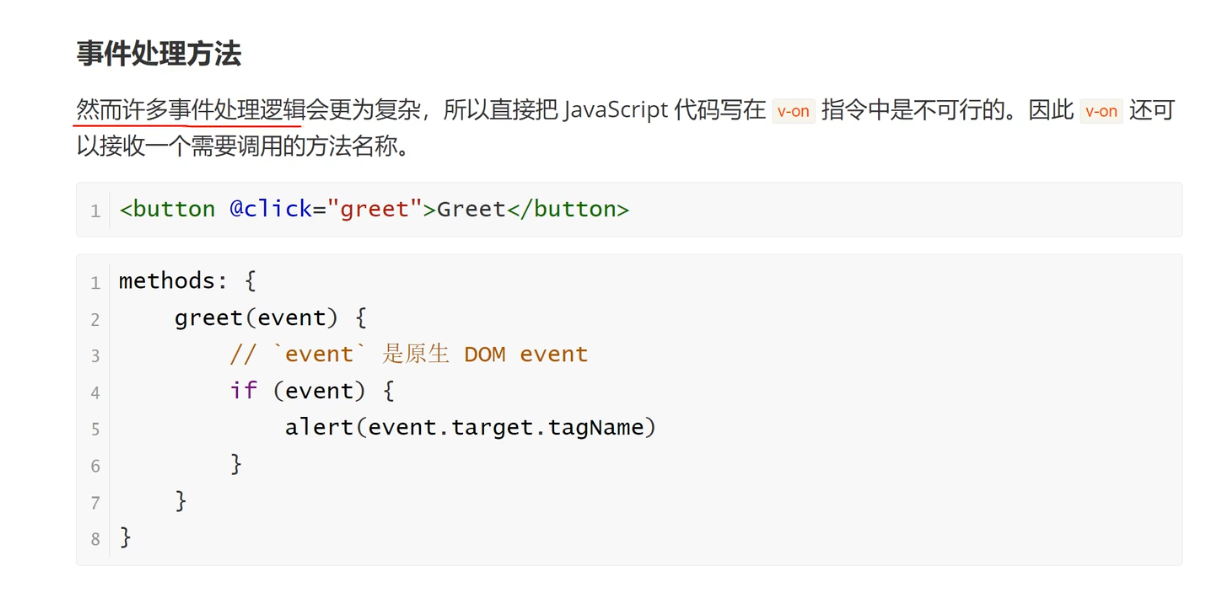
事件处理方法
1
2
3
4
5
6
7
8
9
10
11
12
13
14
15
16
17
18
| <template>
<button @click="clickEvent">{{ count }}</button>
</template>
<script>
export default {
data(){
return{
count:0
}
},
methods:{
clickEvent(){
this.count+=1;
}
}
}
</script>
|
1
2
3
4
5
6
7
8
9
10
11
12
13
14
15
16
17
18
19
20
21
22
23
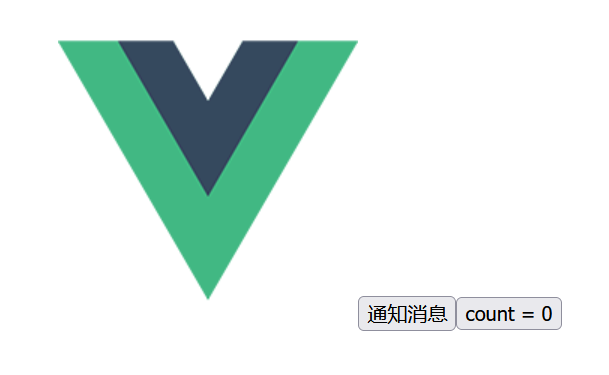
| <template>
<button @click="clickEvent">{{ message }}</button>
<button @click="Increment">count = {{ count }}</button>
</template>
<script>
export default {
data() {
return {
count: 0,
message: "通知消息"
}
},
methods: {
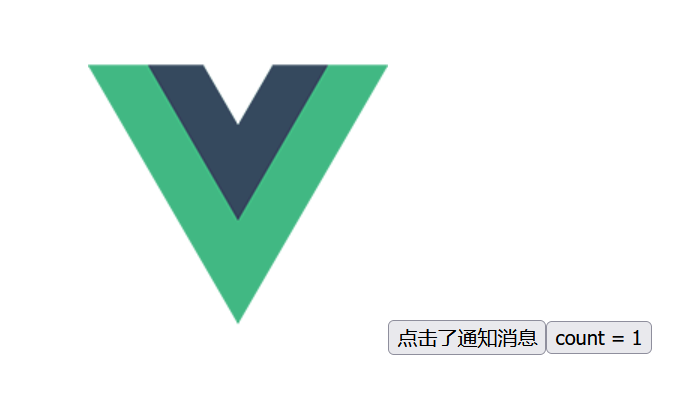
clickEvent(event) {
event.target.innerHTML = "点击了通知消息";
},
Increment() {
this.count += 1;
}
}
}
</script>
|
点击前:
点击两个按钮后:
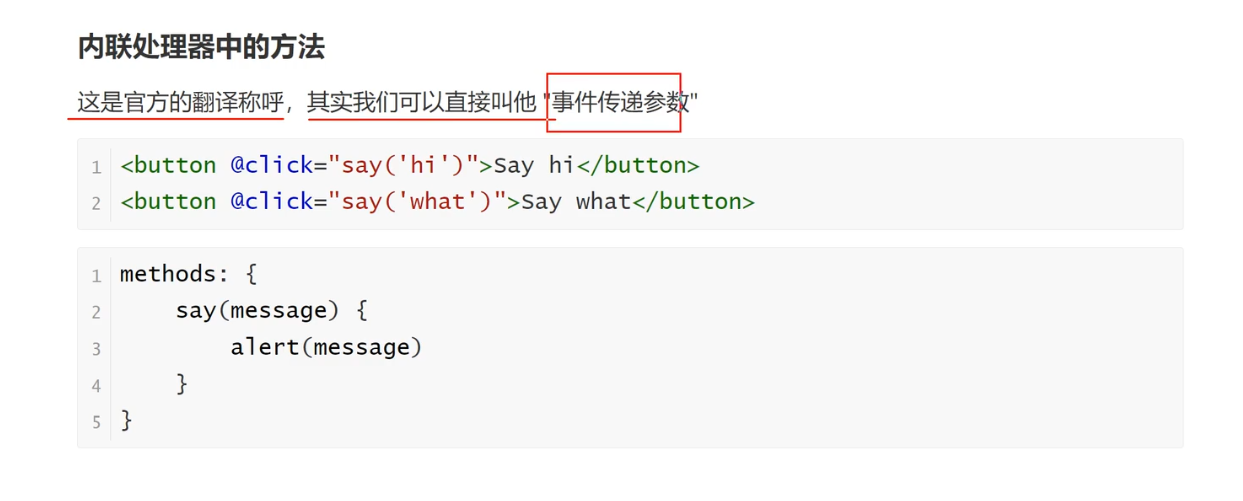
内联处理器中的方法/事件传递参数
1
2
3
4
5
6
7
8
9
10
11
12
13
14
15
16
17
18
19
20
21
22
23
24
25
|
<template>
<li @click="ItemHandle(item)" v-for="(item,index) in List" :key="index">
{{ item }}
</li>
</template>
<script>
export default {
data() {
return {
count: 0,
message: "通知消息",
List:[
'111','222','333'
]
}
},
methods: {
ItemHandle(item){
alert(item);
}
}
}
</script>
|
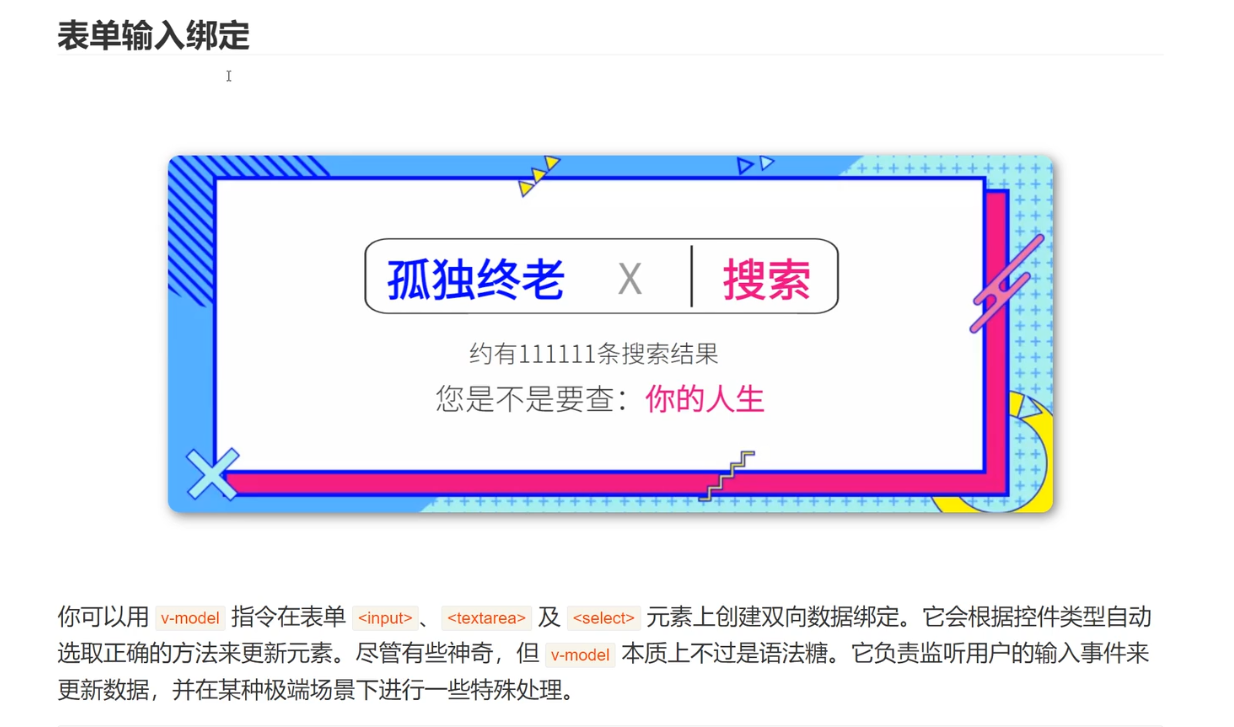
表单输入绑定
1
2
3
4
5
6
7
8
9
10
11
12
13
14
| <template>
<input v-model="username">
<p>{{ username }}</p>
</template>
<script>
export default {
data(){
return{
username:""
}
}
}
</script>
|
实现效果,p标签中的值根据表单输入数据实时更新
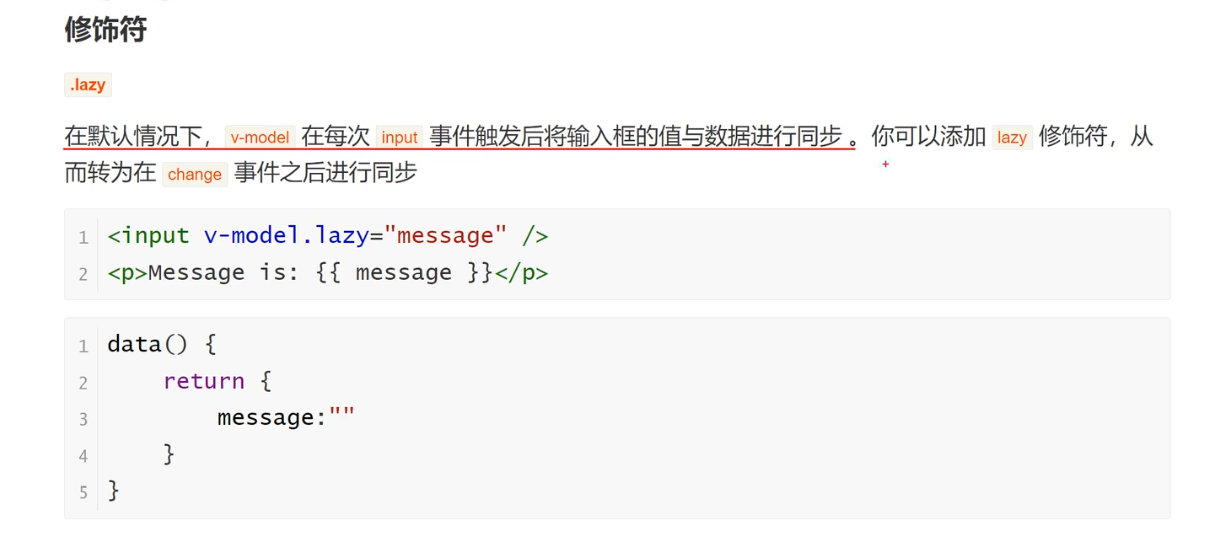
修饰符
.lazy
1
2
3
4
5
6
7
8
9
10
11
12
13
14
| <template>
<input v-model.lazy="username">
<p>{{ username }}</p>
</template>
<script>
export default {
data(){
return{
username:""
}
}
}
</script>
|
回车之后才会同步更新,不会再一边输入一边同步
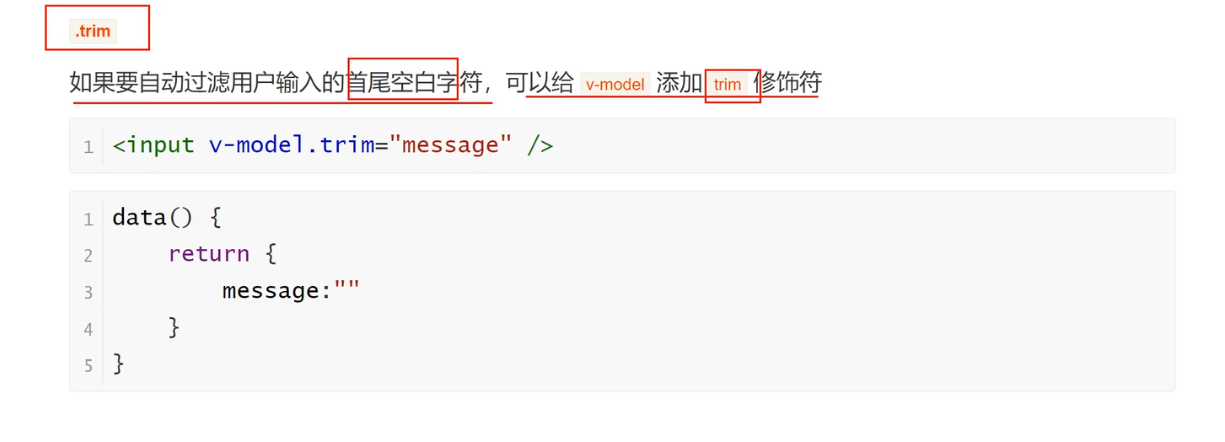
.trim
组件基础
单文件组件

模板:html(必须存在),逻辑:js(看需求存在),样式:css(看需求存在
1
2
3
4
5
6
7
8
9
10
11
| <template>
</template>
<script>
</script>
<style>
</style>
|
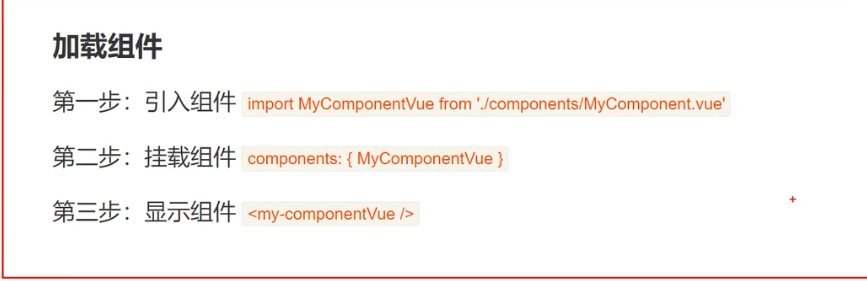
加载组件
1
2
3
4
5
6
7
8
9
10
11
12
13
14
15
16
17
18
19
20
21
22
23
24
25
26
27
28
29
30
31
32
33
34
35
36
37
38
39
40
41
42
43
44
45
46
47
48
49
50
51
52
|
<template>
<h3>MyComponent</h3>
</template>
<script>
export default{
name:'Mycomponent'
}
</script>
<style scoped>
h3{
color: crimson;
}
</style>
<template>
<img alt="Vue logo" src="./assets/logo.png">
<MyComponent/>
<my-component/>
</template>
<script>
import MyComponent from './components/MyComponent.vue';
export default {
name: 'App',
components: {
MyComponent
}
}
</script>
<style>
#app {
font-family: Avenir, Helvetica, Arial, sans-serif;
-webkit-font-smoothing: antialiased;
-moz-osx-font-smoothing: grayscale;
text-align: center;
color: #2c3e50;
margin-top: 60px;
}
</style>
|
效果:

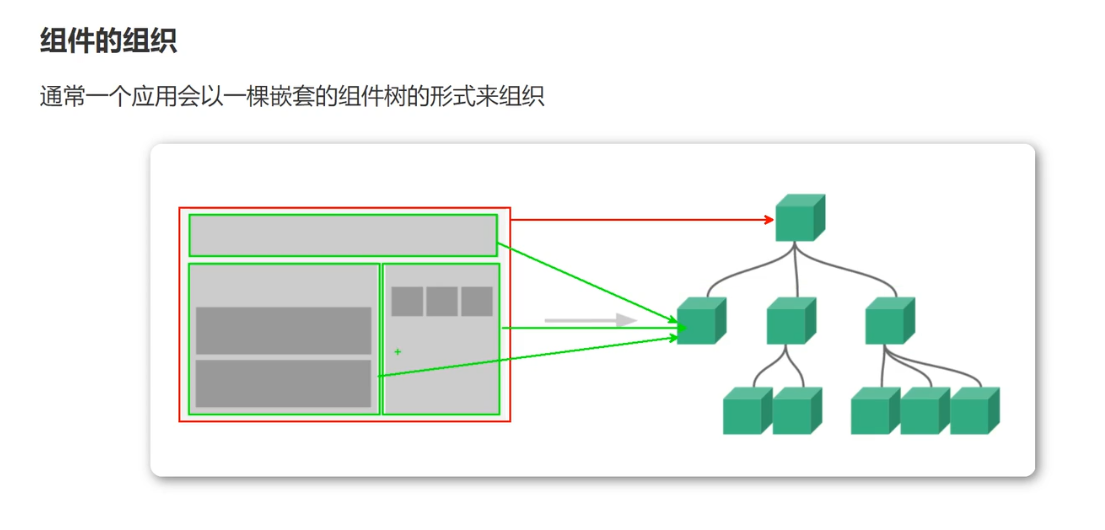
组件的组织
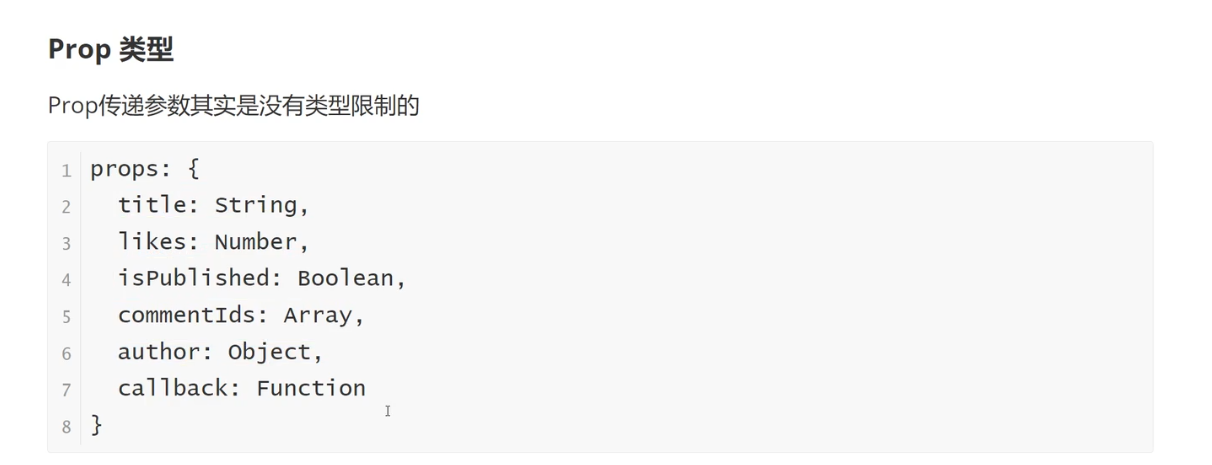
Props组件交互

父组件怎么向子组件中传参?
1
2
3
4
5
6
7
8
9
10
11
12
13
14
15
16
17
18
19
20
21
22
23
24
25
26
27
28
29
30
31
32
33
34
35
36
37
38
39
40
41
42
43
44
45
46
47
48
49
50
51
52
53
54
55
56
57
58
|
<template>
<img alt="Vue logo" src="./assets/logo.png">
<MyComponent :title="title"/>
</template>
<script>
import MyComponent from './components/MyComponent.vue';
export default {
name: 'App',
components: {
MyComponent
},
data(){
return {
title:"props组件交互"
}
}
}
</script>
<style>
#app {
font-family: Avenir, Helvetica, Arial, sans-serif;
-webkit-font-smoothing: antialiased;
-moz-osx-font-smoothing: grayscale;
text-align: center;
color: #2c3e50;
margin-top: 60px;
}
</style>
<template>
<h3>props组件交互</h3>
<p>{{ title }}</p>
</template>
<script>
export default{
name:'MyComponent',
props:{
title:{
type:String,
default:"null"
}
}
}
</script>
<style scoped>
h3{
color: crimson;
}
p{
color:aquamarine;
}
</style>
|
1
2
3
4
5
6
7
8
9
10
11
12
13
14
15
16
17
18
19
20
21
22
23
24
25
26
27
28
29
30
31
32
33
34
35
36
37
38
39
40
41
42
43
44
45
46
47
48
49
50
51
52
53
54
55
56
57
58
59
60
61
62
63
64
65
66
67
68
69
70
71
72
73
|
<template>
<img alt="Vue logo" src="./assets/logo.png">
<MyComponent :title="name" :age="age" :List="List"/>
</template>
<script>
import MyComponent from './components/MyComponent.vue';
export default {
name: 'App',
components: {
MyComponent
},
data(){
return {
name:"props",
age:20,
List:['amy','bob','cindy']
}
}
}
</script>
<style>
#app {
font-family: Avenir, Helvetica, Arial, sans-serif;
-webkit-font-smoothing: antialiased;
-moz-osx-font-smoothing: grayscale;
text-align: center;
color: #2c3e50;
margin-top: 60px;
}
</style>
<template>
<h3>props组件交互</h3>
<p>{{ title }}</p>
<p>age = {{ age }}</p>
<p v-for="(item,index) in List" :key="index"> {{ item }} </p>
</template>
<script>
export default{
name:'MyComponent',
props:{
title:{
type:String,
default:"null"
},
age:{
type:Number,
default:0
},
List:{
type:Array,
default:function(){
return [];
}
}
}
}
</script>
<style scoped>
h3{
color: crimson;
}
p{
color:aquamarine;
}
</style>
|
自定义事件组件交互
用$emit()
1
2
3
4
5
6
7
8
9
10
11
12
13
14
15
16
17
18
19
20
21
22
23
24
25
26
27
28
29
30
31
32
33
34
35
36
37
38
39
40
41
42
43
44
45
46
47
48
49
50
51
52
53
54
55
56
57
58
59
60
61
62
63
64
65
66
67
68
69
70
71
72
|
<template>
<h3>自定义事件组件交互</h3>
<button @click="SendMessage">Click~</button>
</template>
<script>
export default{
name:'MyComponent',
data(){
return{
message:'这是一个信息'
}
},
methods:{
SendMessage(){
this.$emit('OnEvent',this.message);
}
}
}
</script>
<style scoped>
h3{
color: crimson;
}
p{
color:aquamarine;
}
</style>
<template>
<img alt="Vue logo" src="./assets/logo.png">
<MyComponent @OnEvent="GetMessage" />
<p>{{ Message }}</p>
</template>
<script>
import MyComponent from './components/MyComponent.vue';
export default {
name: 'App',
components: {
MyComponent
},
data(){
return{
Message:""
}
},
methods: {
GetMessage(Message) {
this.Message = Message
}
}
}
</script>
<style>
#app {
font-family: Avenir, Helvetica, Arial, sans-serif;
-webkit-font-smoothing: antialiased;
-moz-osx-font-smoothing: grayscale;
text-align: center;
color: #2c3e50;
margin-top: 60px;
}
</style>
|
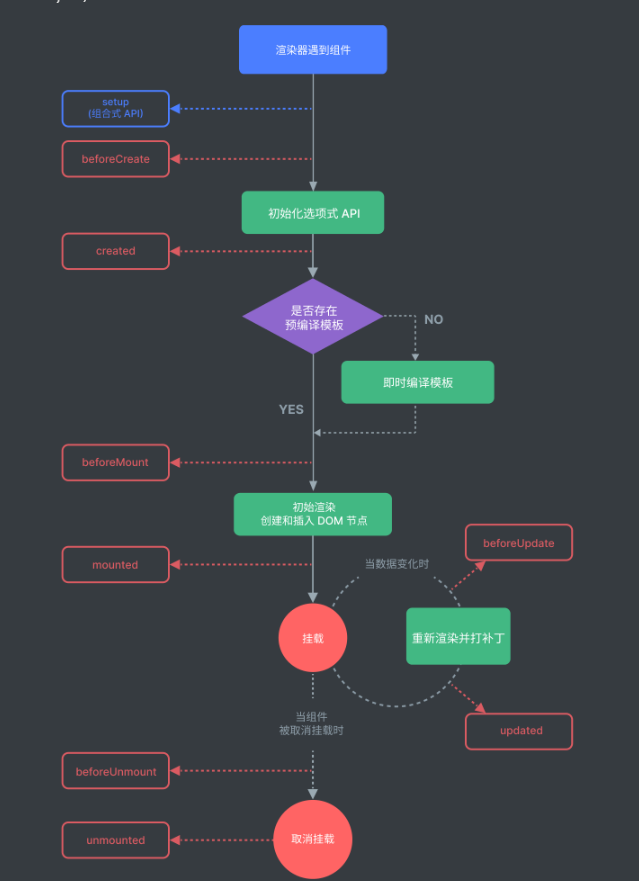
组件生命周期

示意图
1
2
3
4
5
6
|
npm init vue@latest
npm install / cnpm i
npm run dev
|
生命周期
钩子函数不能写在methods块中
1
2
3
4
5
6
7
8
9
10
11
12
13
14
15
16
17
18
19
20
21
22
23
24
25
26
27
28
29
30
31
32
33
34
35
36
37
38
39
40
41
42
43
| <template>
<h3>组件生命周期</h3>
<button @click="Increment">count = {{ count }}</button>
</template>
<script>
export default {
data() {
return {
count: 0
}
},
methods: {
Increment() {
this.count += 1;
},
},
beforeCreate() {
console.log('创建前');
},
created() {
console.log('已创建');
},
beforeMount() {
console.log('挂载前');
},
mounted() {
console.log('已挂载');
},
beforeUpdate() {
console.log('更新前');
},
updated() {
console.log('更新后');
}
}
</script>
<style>
h3 {
color: crimson;
}
</style>
|
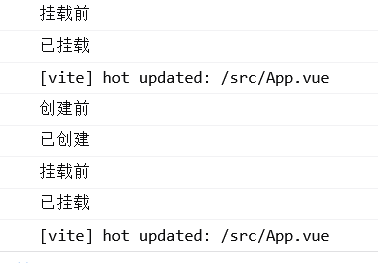
结果:
Vue引入第三方
https://github.com/vuejs/awesome-vue
Swiper
官方文档:https://swiperjs.com/vue
必须引入Swiper和SwiperSlide组件和swiper/css中的样式
1
2
|
npm install --save swiper@8.1.6
|
1
2
3
4
5
6
7
8
9
10
11
12
13
14
15
16
17
18
19
20
21
22
23
24
25
26
27
28
29
| <template>
<Swiper>
<SwiperSlide>
<img src="../assets/logo.png">
</SwiperSlide>
<SwiperSlide>
<img src="../assets/logo.png">
</SwiperSlide>
<SwiperSlide>
<img src="../assets/logo.png">
</SwiperSlide>
</Swiper>
</template>
<script>
import { Swiper, SwiperSlide } from 'swiper/vue';
import 'swiper/css';
export default {
name: 'HelloWorld',
components: {
Swiper,
SwiperSlide
}
}
</script>
<style scoped></style>
|
添加指示器
1
2
3
4
5
6
7
8
9
10
|
import { Pagination } from 'swiper';
import 'swiper/css/pagination';
data(){
return{
modules:[Pagination]
}
}
|
1
2
3
4
5
6
7
8
9
10
11
12
13
14
15
16
17
18
19
20
21
22
23
24
25
26
27
28
29
30
31
32
33
34
35
36
37
| <template>
<Swiper :modules="modules" :pagination="{clickable:true}">
<SwiperSlide>
<img src="../assets/logo.png">
</SwiperSlide>
<SwiperSlide>
<img src="../assets/logo.png">
</SwiperSlide>
<SwiperSlide>
<img src="../assets/logo.png">
</SwiperSlide>
</Swiper>
</template>
<script>
import { Pagination } from 'swiper';
import { Swiper, SwiperSlide } from 'swiper/vue';
import 'swiper/css';
import 'swiper/css/pagination';
export default {
name: 'HelloWorld',
data(){
return{
modules:[Pagination]
}
},
components: {
Swiper,
SwiperSlide
}
}
</script>
<style scoped></style>
|
效果:

生命周期应用
通过ref获取元素DOM结构
获取DOM的时机:
不能是创建期:UI还未渲染到页面上,无DOM结构
挂载期:挂载前不行,理由同上;挂载后(mounted)可以
更新期与销毁期也可以
1
2
3
4
5
6
7
8
9
10
11
12
13
14
15
16
17
18
19
20
21
22
23
24
25
26
| <template>
<p ref="name">ref~</p>
</template>
<script>
export default{
mounted(){
console.log(this.$refs.name);
}
}
</script>
<template>
<User />
</template>
<script>
import User from './components/User.vue'
export default{
components:{
User
}
}
</script>
|
模拟网络请求渲染数据
时机:
created:先获取到数据,但是还没渲染
mounted:先渲染再获取数据
我们选择后者的逻辑
AXios网络请求封装
1
2
3
4
| cnpm install --save axios
cnpm install --save querystring
vue create demo
npm run serve
|
在src下新建一个目录utils,创建文件request.js来封装网络请求
1
2
3
4
5
6
7
8
9
10
11
12
13
14
15
16
17
18
19
20
21
22
23
24
25
26
27
28
29
30
31
32
33
34
35
36
37
38
39
40
41
42
43
44
45
46
47
48
| import querystring from 'querystring'
import axios from 'axios'
import { config } from 'process';
import { log } from 'console';
const instance = axios.create({
timeout: 10000
})
const errorHandle = (status,info) => {
switch(status){
default:
console.log(info);
}
}
instance.interceptors.request.use(
config => {
if(config.method === 'post'){
config.data = querystring.stringify(config.data);
}
return config;
},
error => {
return Promise.reject(error);
}
);
instance.interceptors.response.use(
response => {
return response.status===200?Promise.resolve(response):Promise.reject(response)
},
error => {
const {response} = error;
errorHandle(response.status,response.info);
}
);
export default instance;
|
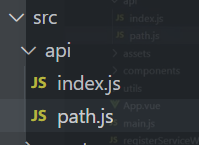
将网络请求集中放在src/api中
1
2
3
4
5
6
7
8
9
10
11
12
13
14
15
16
17
18
19
20
21
|
const Base = {
baseURL: "",
extra:""
}
export default Base;
import axios from "../utils/request";
import path from "./path";
const api = {
get(){
return axios.get(path.baseURL+path.extra);
}
}
export default api;
|
动态组件
1
2
3
4
5
6
7
8
9
10
11
12
13
14
15
16
17
18
19
20
21
22
23
24
25
26
| <template>
<component :is="Component"></component>
<button @click="changeComponent">切换组件</button>
</template>
<script>
import A from './components/A.vue';
import B from './components/B.vue';
export default {
data() {
return {
Component: A,
componentsList: [A, B],
currentIndex: 0,
};
},
methods: {
changeComponent() {
this.currentIndex = (this.currentIndex + 1) % this.componentsList.length;
this.Component = this.componentsList[this.currentIndex];
},
},
};
</script>
|
路由
路由配置

1.安装路由
1
2
3
4
| npm install --save vue-router@4
vue create demo
cd demo
npm run serve
|
2.配置独立的路由文件/src/route/index.js
1
2
3
4
5
6
7
8
9
10
11
12
13
14
15
16
17
18
19
20
21
22
23
24
25
26
27
28
29
30
31
32
33
34
35
|
import { createRouter,createWebHashHistory } from "vue-router";
import Home from '../view/Home.vue';
const routes = [
{path:'/',component:Home},
{path:'/about',component:() => import('@/view/About.vue')}
];
const router = createRouter({
history:createWebHashHistory(),
routes,
});
export default router;
|
3.在main.js中注册组件
1
2
3
4
5
6
7
8
|
import { createApp } from 'vue'
import App from './App.vue'
import './registerServiceWorker'
import router from './route'
createApp(App).use(router).mount('#app');
|
1
2
3
4
5
6
7
8
9
10
11
12
13
14
15
16
17
18
19
20
21
22
23
24
25
26
27
28
|
<template>
<img alt="Vue logo" src="./assets/logo.png">
<RouterLink to="/">首页 |</RouterLink>
<RouterLink to="/about"> 关于</RouterLink>
<router-view></router-view>
</template>
<script>
export default {
name: 'App',
}
</script>
<style>
#app {
font-family: Avenir, Helvetica, Arial, sans-serif;
-webkit-font-smoothing: antialiased;
-moz-osx-font-smoothing: grayscale;
text-align: center;
color: #2c3e50;
margin-top: 60px;
}
</style>
|
传递参数
创建vue项目时把Router也勾选上

1.在routers数组中的path:’/path/:参数名’
2.传递参数:router-link的to中’/path/参数值’
3.读取参数
1
2
3
4
5
6
7
8
9
10
11
12
13
14
15
16
17
18
19
20
21
22
23
24
25
26
27
28
29
30
31
32
33
|
import { createRouter, createWebHashHistory } from 'vue-router'
import HomeView from '../views/HomeView.vue'
const routes = [
{
path: '/',
name: 'home',
component: HomeView
},
{
path: '/about',
name: 'about',
component: () => import('../views/AboutView.vue')
},
{
path:'/news',
component: ()=>import('@/views/News.vue')
},
{
path:'/news/details/:name',
component: ()=>import('@/views/NewsDetails.vue')
}
]
const router = createRouter({
history: createWebHashHistory(),
routes
})
export default router
|
1
2
3
4
5
|
<template>
<h3>平台:</h3>
<p>{{ $route.params.name }}</p>
</template>
|
嵌套路由配置
在页面配置信息的routes数组中的对象中加上children数组,填上子页面的信息(路径不能有/)
如果希望默认打开某个子页面,用redirect重定向
1
2
3
4
5
6
7
8
9
10
11
12
13
14
15
16
17
18
19
20
21
22
23
24
25
26
27
28
29
30
31
32
33
34
35
36
37
|
import { createRouter, createWebHashHistory } from 'vue-router'
import HomeView from '../views/HomeView.vue'
const routes = [
{
path: '/',
name: 'home',
component: HomeView
},
{
path: '/about',
name: 'about',
component: () => import('../views/AboutView.vue'),
redirect:'/about/us',
children:[
{
path:'us',
component: () => import('../views/AboutUs.vue')
},
{
path:'info',
component: () => import('../views/AboutInfo.vue')
}
]
}
]
const router = createRouter({
history: createWebHashHistory(),
routes
})
export default router
|
Vue状态管理(Vuex)

store就相当于集中式存储管理
引入步骤
1.安装Vuex
1
| cnpm install --save vuex
|
2.配置文件/src/store/index.js
1
2
3
4
5
6
7
8
9
| import { createStore } from 'vuex'
export default createStore({
state:{
count:0
}
});
|
3.main.js中use()
1
2
3
4
5
6
| import { createApp } from 'vue'
import App from './App.vue'
import './registerServiceWorker'
import store from '@/store'
createApp(App).use(store).mount('#app')
|
3.访问数据
1
2
3
4
5
6
7
8
9
10
11
12
13
14
15
16
| <template>
<p>{{ $store.state.count }}</p>
<p>{{ count }}</p>
</template>
<script>
//
import { mapState } from 'vuex';
export default{
computed:{
...mapState(['count'])
}
};
</script>
|
Vue状态管理核心(Vuex)

Getter
对Vuex中数据进行过滤
1
2
3
4
5
6
7
8
9
10
11
12
13
| import { createStore } from 'vuex'
export default createStore({
state: {
count:0
},
getters: {
getCount(state){
return state.count>0?state.count:'太小了!!!!!!';
}
},
})
|
1
2
3
4
5
6
7
8
9
10
11
12
13
14
| <template>
<img alt="Vue logo" src="./assets/logo.png">
<p>访问方法1=>{{ $store.getters.getCount }}</p>
<p>访问方法2=>{{ getCount }}</p>
</template>
<script>
import { mapGetters } from 'vuex'
export default {
computed:{
...mapGetters(['getCount'])
}
}
</script>
|
Mutation

1
2
3
4
5
6
7
8
9
10
11
12
13
|
import { createStore } from 'vuex'
export default createStore({
state: {
count: 0
},
mutations: {
addCount(state) {
state.count++;
}
}
})
|
调用方法
1
2
3
4
5
6
7
8
9
10
11
12
13
14
15
16
17
18
19
20
21
22
23
24
25
26
27
28
29
30
31
32
33
34
35
| <template>
<img alt="Vue logo" src="./assets/logo.png">
<p>访问方法1=>{{ $store.getters.getCount }}</p>
<p>访问方法2=>{{ getCount }}</p>
<button @click="addCountHandle">Click~</button>
</template>
<script>
import { mapGetters } from 'vuex'
export default {
computed: {
...mapGetters(['getCount'])
},
methods: {
addCountHandle() {
this.$store.commit('addCount');
}
}
}
</script>
<script>
import { mapGetters,mapMutations } from 'vuex'
export default {
computed: {
...mapGetters(['getCount'])
},
methods: {
...mapMutations(['addCount']),
addCountHandle() {
this.addCount();
}
}
}
</script>
|
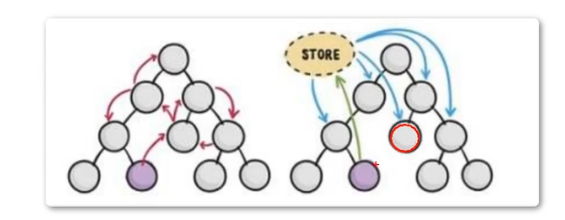
Action
1
2
3
4
5
6
7
8
9
10
11
12
13
14
15
16
17
18
19
20
21
22
23
24
25
26
27
28
29
30
31
| import { createStore } from 'vuex'
import axios from 'axios'
export default createStore({
state: {
count: 0
},
getters: {
getCount(state) {
return state.count > 0 ? state.count : '太小了!!!!!!';
}
},
mutations: {
addCount(state) {
state.count++;
}
},
actions: {
asyncAddCount({ commit }) {
axios.get('')
.then(
res=>{
commit('addCount');
}
)
}
}
})
|
1
2
3
4
5
6
7
8
9
10
11
12
13
14
15
16
17
18
19
20
21
22
23
24
25
| <template>
<img alt="Vue logo" src="./assets/logo.png">
<p>访问方法1=>{{ $store.getters.getCount }}</p>
<p>访问方法2=>{{ getCount }}</p>
<button @click="addCountHandle">Click~</button>
<button @click="AsyncAddCountHandle">Click~</button>
</template>
<script>
import { mapGetters,mapMutations } from 'vuex'
export default {
computed: {
...mapGetters(['getCount'])
},
methods: {
...mapMutations(['addCount']),
addCountHandle() {
this.addCount();
},
AsyncAddCountHandle(){
this.$store.dispatch('asyncAddCount');
}
}
}
</script>
|
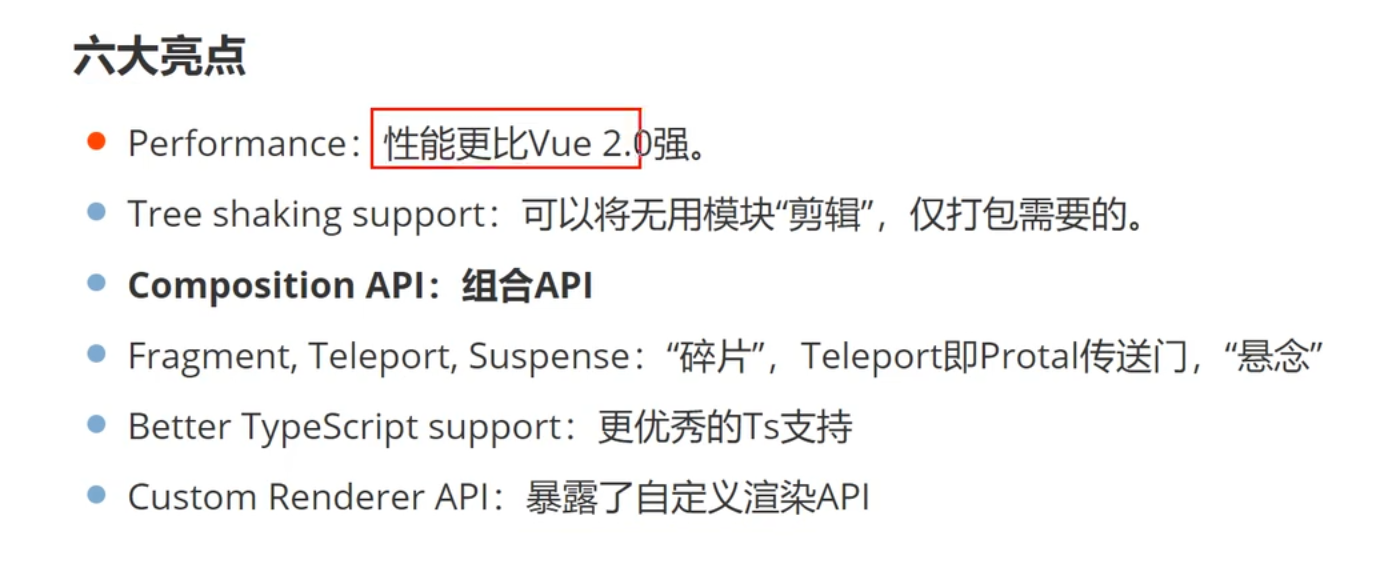
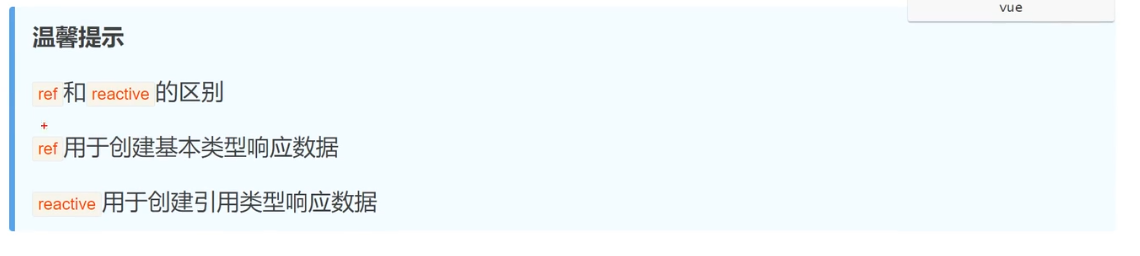
Vue3新特性
ref或reactive
组合式API替换data(){},在setup()中声明变量(必须return)
vue2.x中在data的return中声明
1
2
3
4
5
6
7
8
9
10
11
12
13
14
| <template>
<h3>vue3特性</h3>
<span>{{ message }}</span>
</template>
<script>
export default{
data(){
return{
message:"message"
}
}
}
</script>
|
用ref或reactive进行声明
1
2
3
4
5
6
7
8
9
10
11
12
13
14
15
16
17
18
19
20
21
22
23
24
25
26
27
| <template>
<h3>vue3特性</h3>
<span>{{ message }}</span>
<ul>
<li v-for="(item,index) in name.list" :key="index">{{ item }}</li>
</ul>
</template>
<script>
import {reactive, ref} from 'vue'
export default{
setup(){
const message = ref("ref");
const name = reactive({
list:['111','222','333']
})
return{
message,
name
}
}
}
</script>
|
methods中定义的方法写在setup()
1
2
3
4
5
6
7
8
9
10
11
12
13
14
15
16
17
18
19
20
21
22
23
24
| <template>
<h3>vue3特性</h3>
<button @click="Increment">count = {{ count }}</button>
</template>
<script>
import { reactive, ref } from 'vue'
export default {
setup() {
let count = ref(0);
const Increment = () => {
count.value += 1;
};
return {
count,
Increment
}
}
}
</script>
|
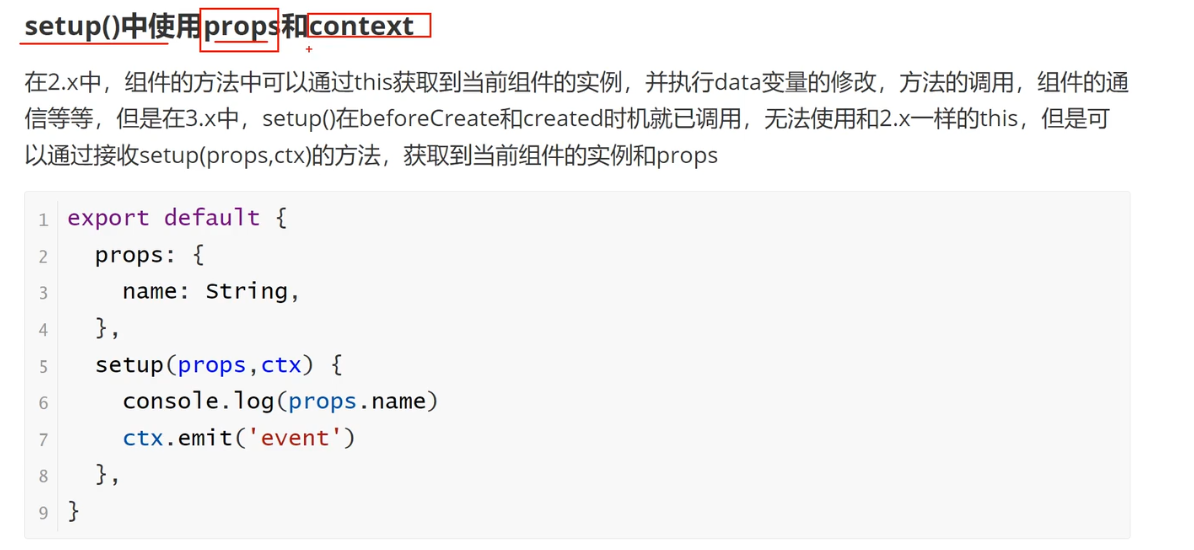
setup()中使用props和content
1
2
3
4
5
6
7
8
9
10
11
12
13
14
| <template>
<h3>vue3特性</h3>
<button @click="Increment">count = {{ count }}</button>
</template>
<script>
import { reactive, ref } from 'vue'
export default {
setup(props) {
}
}
</script>
|

1
2
3
4
5
6
7
8
9
10
11
12
13
14
15
16
17
18
19
20
21
22
23
24
25
26
27
28
29
30
| <template>
<h3>vue3特性</h3>
</template>
<script>
export default {
props: {
message: String
},
setup(props) {
console.log(props.message)
}
}
</script>
<template>
<HelloWorld message="msg" />
</template>
<script>
import HelloWorld from './components/HelloWorld.vue';
export default {
components:{
HelloWorld
}
}
</script>
|
1
2
3
4
5
6
7
8
9
10
11
12
13
14
15
16
17
18
19
20
21
| <template>
<h3>vue3特性</h3>
<h3>{{ msg }}</h3>
</template>
<script>
export default {
props: {
message: String
},
setup(props) {
const msg = props.message;
return {
msg,
}
}
}
</script>
|
setup中无法使用this获取实例对象,使用content可以获取实例对象
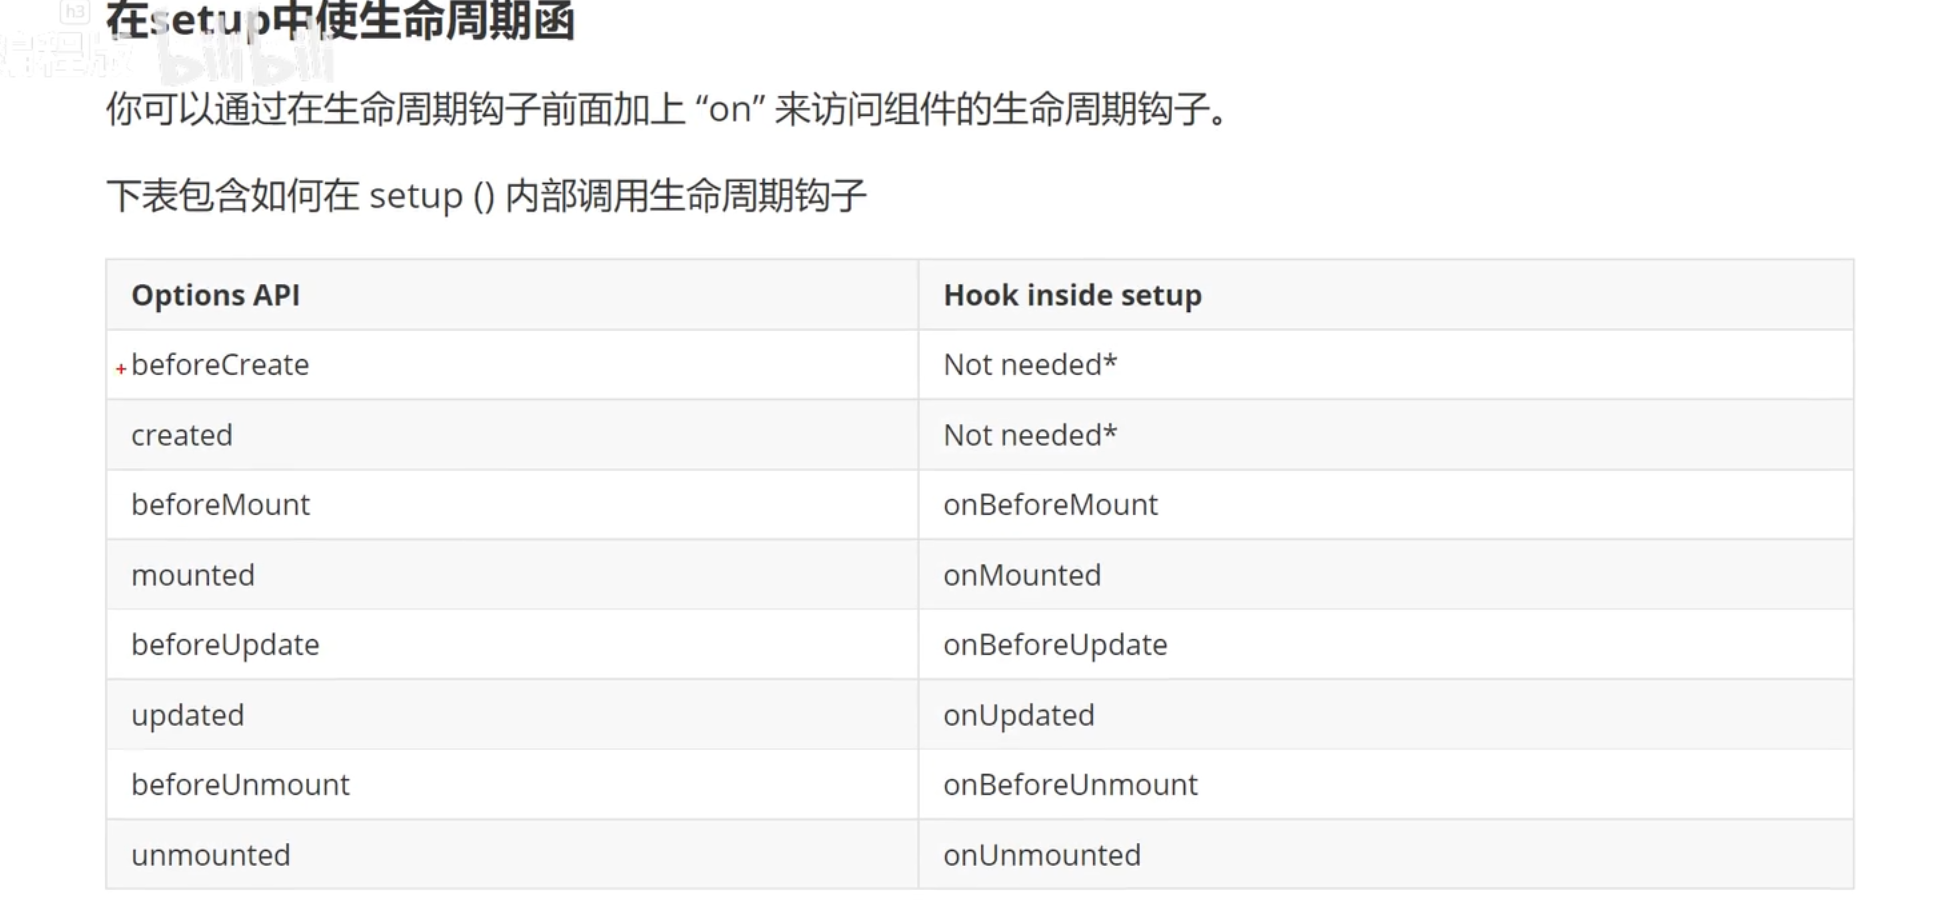
setup()中使用生命周期函数
优势:setup中可以同时存在多个生命周期函数
1
2
3
4
5
6
7
8
9
10
11
12
13
14
15
16
17
18
19
20
21
22
23
24
25
26
27
28
29
30
31
32
33
34
35
36
37
38
| <template>
<h3>vue3特性</h3>
<h3>{{ msg }}</h3>
</template>
<script>
import { onBeforeMount, onBeforeUnmount, onBeforeUpdate, onMounted, onUnmounted, onUpdated } from 'vue';
export default {
setup() {
onMounted(() => {
console.log('onMounted1');
}),
onMounted(() => {
console.log('onMounted2');
}),
onBeforeMount(() => {
}),
onUpdated(() => {
}),
onBeforeUpdate(() => {
}),
onUnmounted(() => {
}),
onBeforeUnmount(() => {
})
}
}
</script>
|
Provide/Inject
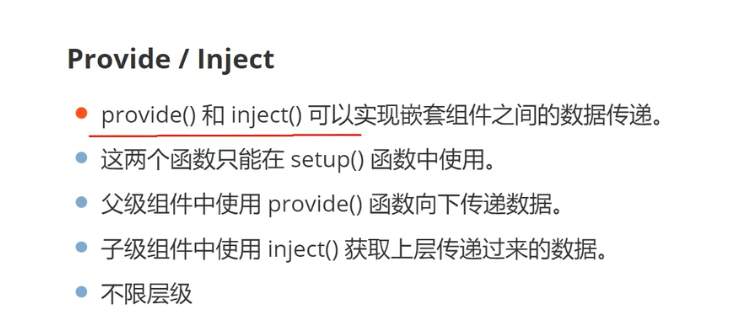
可以跨层级传递,但是必须从上至下
1
2
3
4
5
6
7
8
9
10
11
12
13
14
15
16
17
18
19
20
21
22
23
24
25
26
27
28
29
30
31
32
33
34
35
36
37
38
39
40
41
42
43
44
45
46
47
48
49
50
51
|
<template>
<h3>{{ msg }}</h3>
</template>
<script>
import { inject } from 'vue';
export default{
setup(){
const msg = inject("msg");
return{
msg
}
}
}
</script>
<template>
<img alt="Vue logo" src="./assets/logo.png">
<HelloWorld/>
</template>
<script>
import { provide } from 'vue';
import HelloWorld from './components/HelloWorld.vue'
export default {
name: 'App',
components: {
HelloWorld
},
setup() {
provide("msg","provide的消息")
}
}
</script>
<style>
#app {
font-family: Avenir, Helvetica, Arial, sans-serif;
-webkit-font-smoothing: antialiased;
-moz-osx-font-smoothing: grayscale;
text-align: center;
color: #2c3e50;
margin-top: 60px;
}
</style>
|
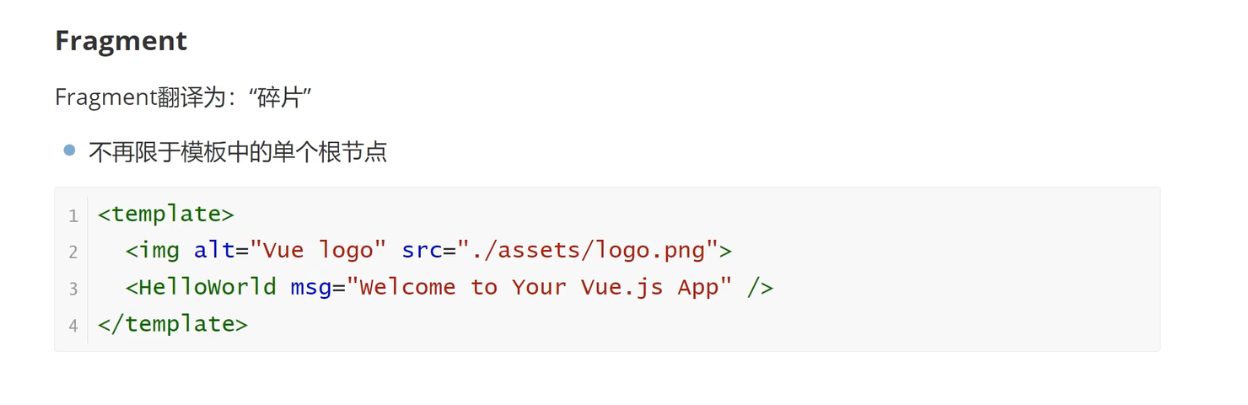
Fragment
Element-Plus
官网:https://element-plus.sxtxhy.com/zh-CN/
安装
1
| npm install element-plus --save
|
完整引入
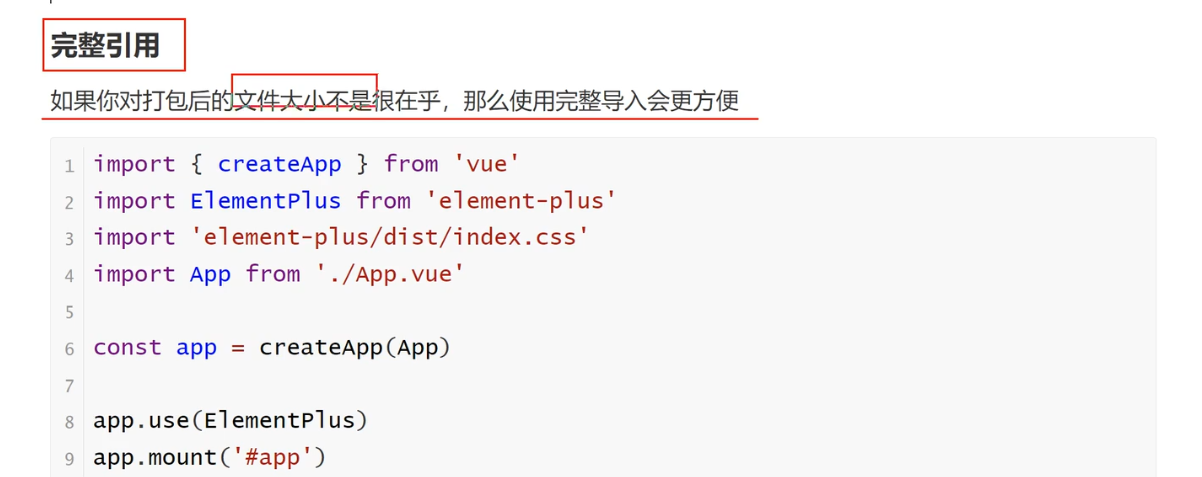
1
2
3
4
5
6
7
8
|
import { createApp } from 'vue'
import ElementPlus from 'element-plus'
import 'element-plus/dist/index.css'
import App from './App.vue'
import './registerServiceWorker'
createApp(App).use(ElementPlus).mount('#app')
|
在官网上复制相关组件的代码
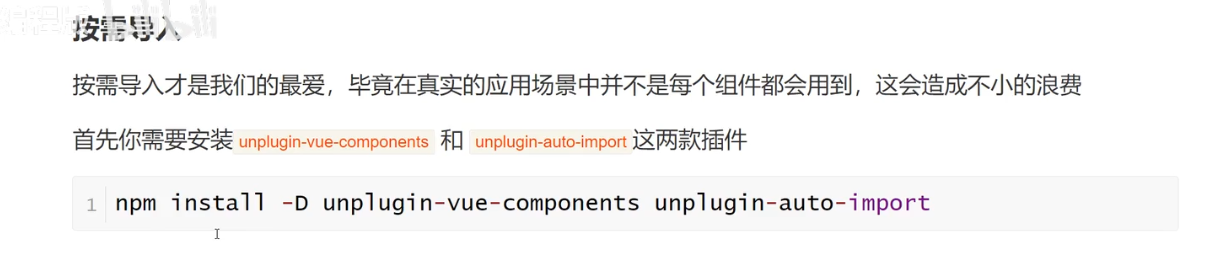
按需引入
1
| npm install -D unplugin-vue-components unplugin-auto-import
|
1
2
3
4
5
6
7
8
9
10
11
12
13
14
15
16
17
18
19
|
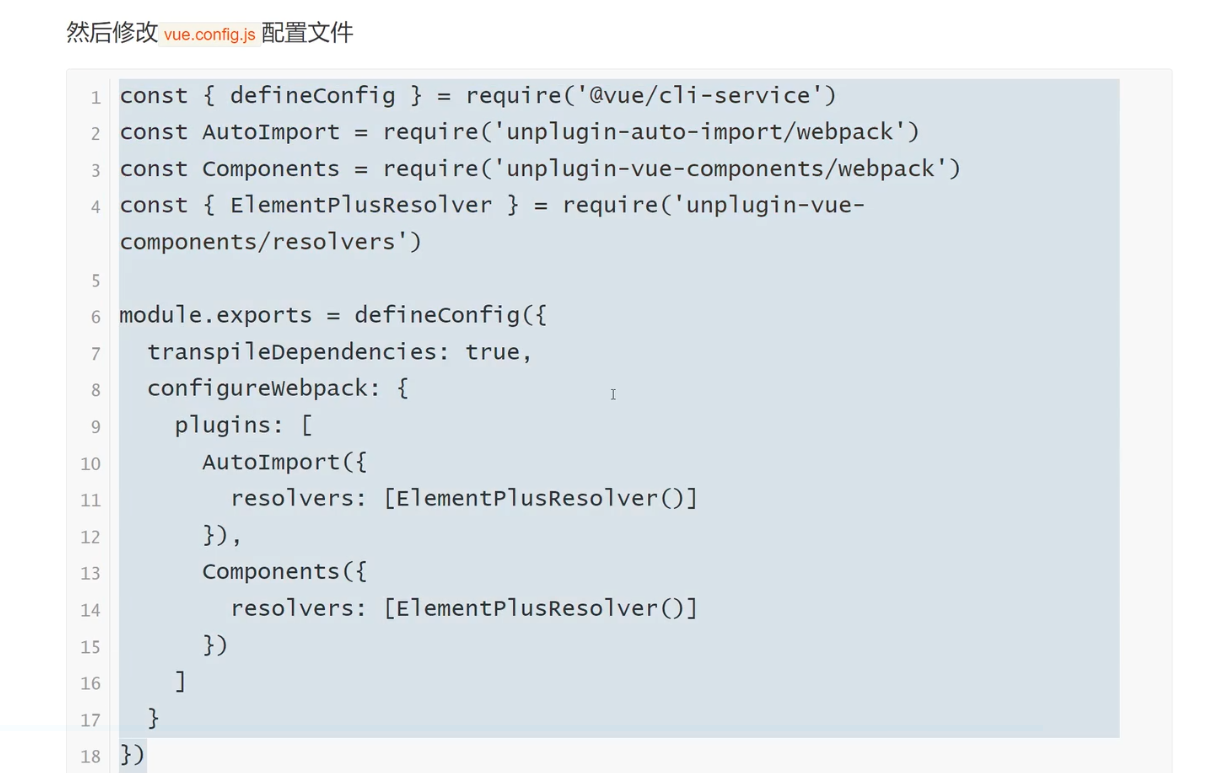
const { defineConfig } = require('@vue/cli-service')
const AutoImport = require('unplugin-auto-import/webpack')
const Components = require('unplugin-vue-components/webpack')
const { ElementPlusResolver } = require('unplugin-vue-components/resolvers')
module.exports = defineConfig({
transpileDependencies: true,
configureWebpack: {
plugins: [
AutoImport({
resolvers: [ElementPlusResolver()]
}),
Components({
resolvers: [ElementPlusResolver()]
})
]
}
})
|
加载字体图标
1
2
| npm update unplugin-auto-import unplugin-vue-components
npm install @element-plus/icons-vue
|
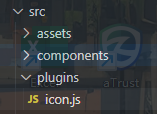
全局注册
创建/src/plugins/icon.js
1
2
3
4
5
6
7
8
9
10
|
import * as components from "@element-plus/icons-vue";
export default {
install: (app) => {
for (const key in components) {
const componentConfig = components[key];
app.component(componentConfig.name, componentConfig);
}
},
};
|
1
2
3
4
5
6
7
8
|
import { createApp } from 'vue'
import App from './App.vue'
import './registerServiceWorker'
import 'element-plus/dist/index.css'
import icon from './plugins/icon'
createApp(App).use(icon).mount('#app')
|
然后从官网复制图像的代码
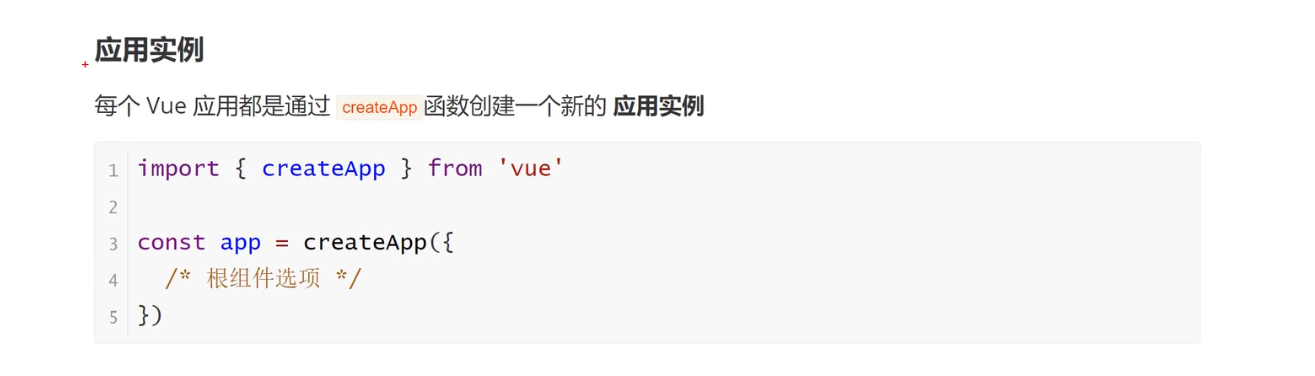
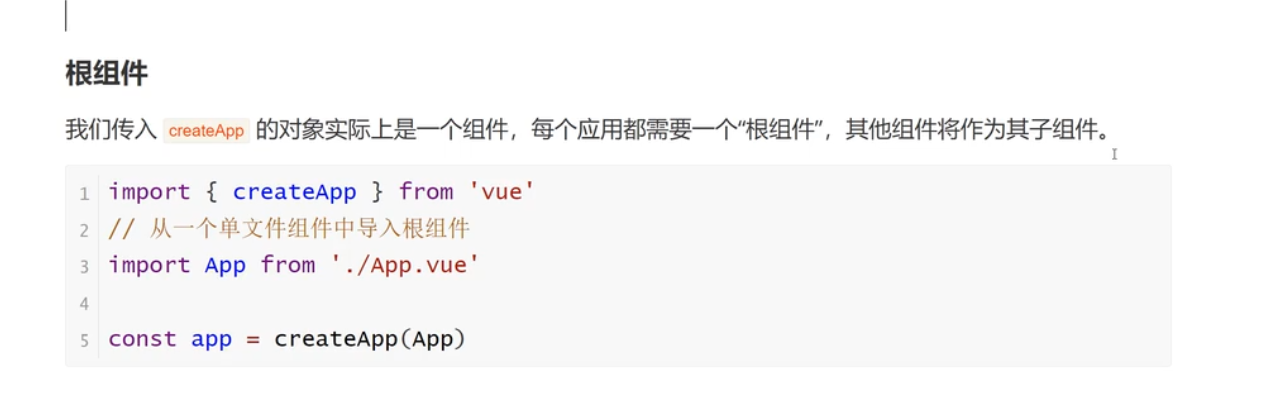
Vue应用
应用实例
Vue的实例对象有且仅有一个
根组件
挂载应用
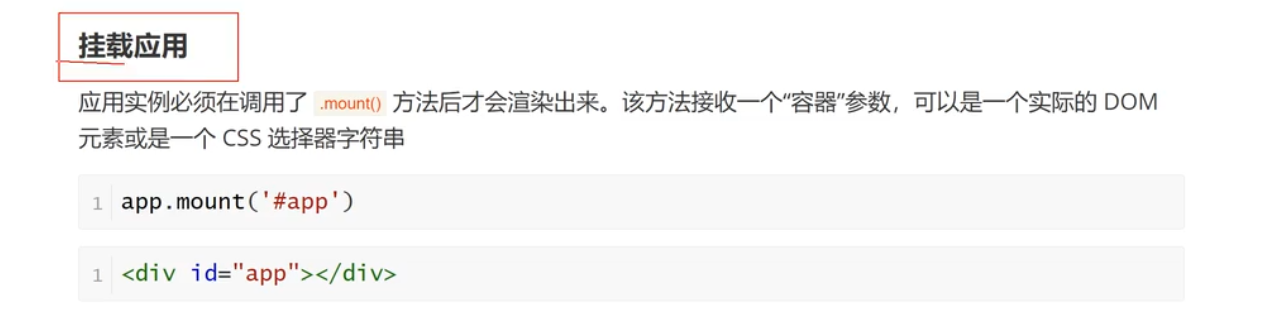
#app会去index.html(与src同级)中寻找dom元素app
1
2
3
4
5
6
7
8
9
10
11
12
13
14
| <!DOCTYPE html>
<html lang="en">
<head>
<meta charset="UTF-8">
<meta name="viewport" content="width=device-width, initial-scale=1.0">
<title>Vue</title>
</head>
<body>
<div id="app">
111
</div>
<script type="module" src="/src/main.js"></script>
</body>
</html>
|
公共资源

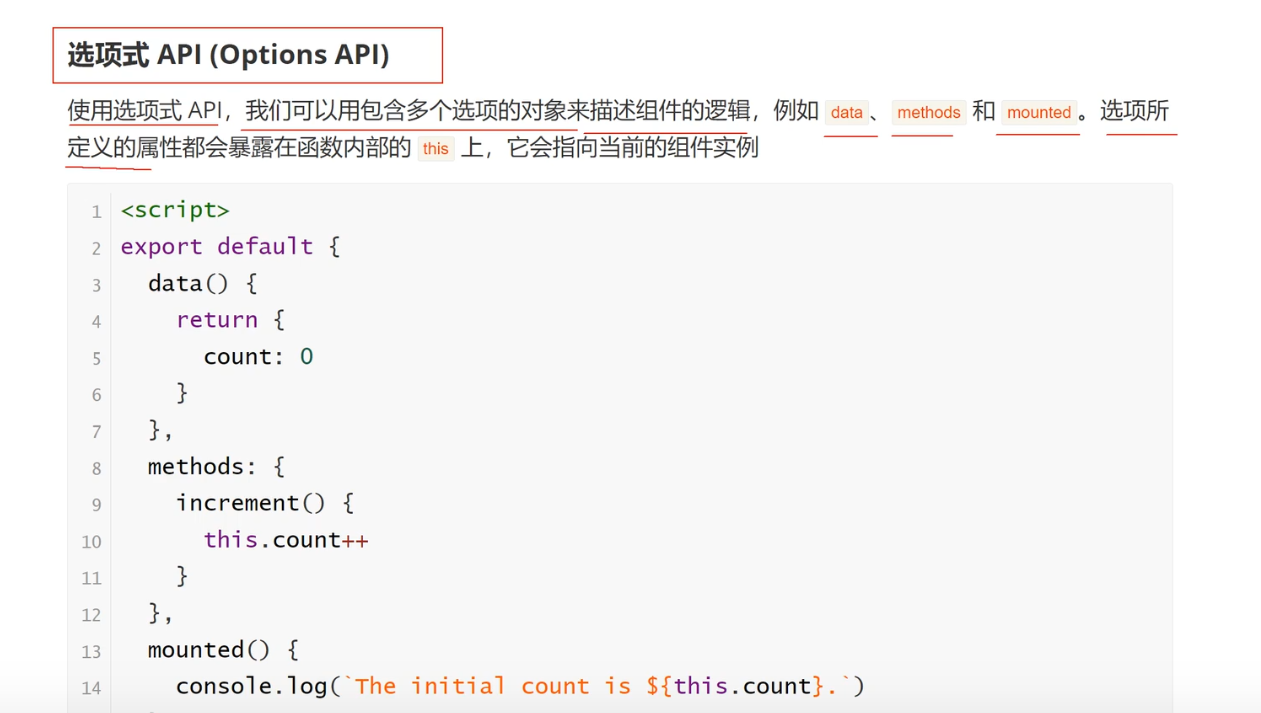
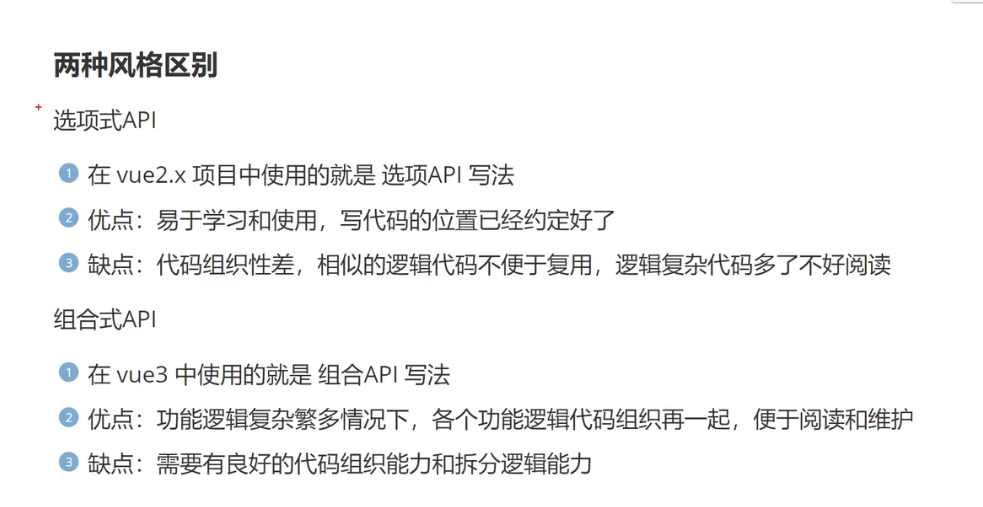
两种风格的API
选项式API
1
2
3
4
5
6
7
8
9
10
11
12
13
14
15
16
17
18
19
20
21
22
23
24
25
26
27
28
29
30
31
| <template>
<button @click="Increment">count = {{ count }}</button>
</template>
<script>
export default {
data() {
return {
count: 0
}
},
methods: {
Increment() {
this.count++;
}
}
}
</script>
<template>
<Options />
</template>
<script>
import Options from './components/Options.vue';
export default{
components:{
Options
}
}
</script>
|
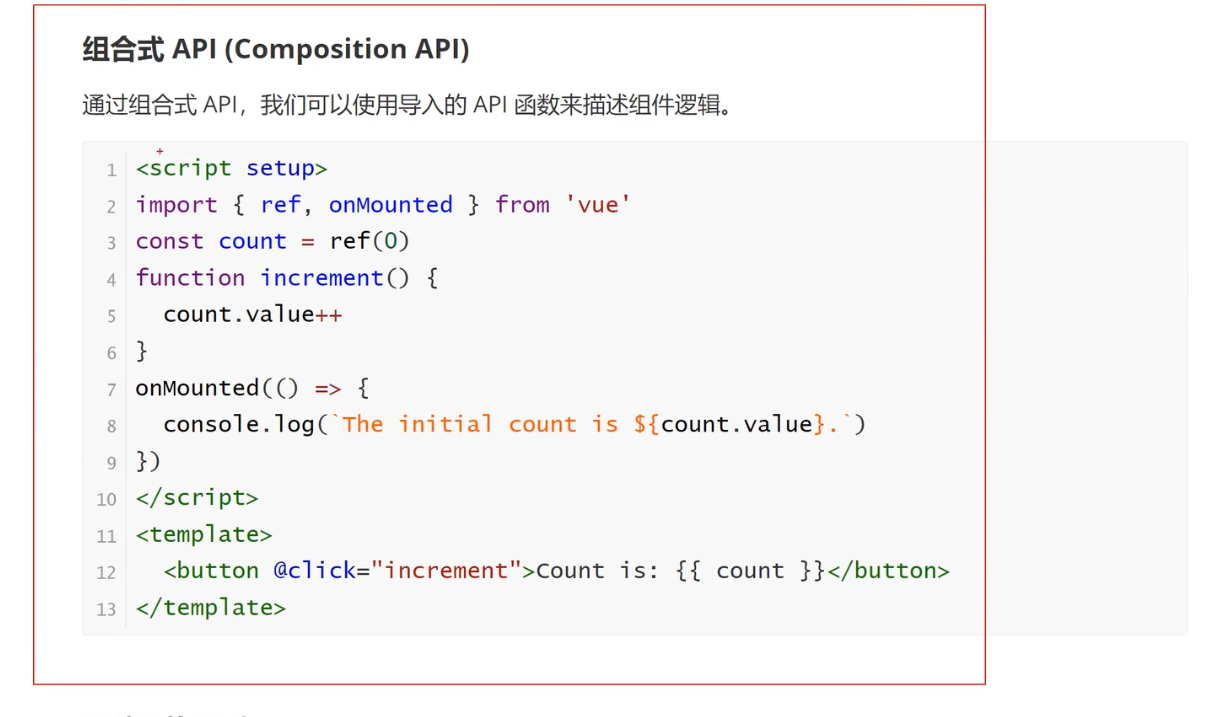
组合式API
1
2
3
4
5
6
7
8
9
10
11
12
13
14
15
16
17
| <template>
<button @click="Increment">count = {{ count }}</button>
</template>
<script setup>
import {ref,onMounted} from 'vue'
const count = ref(0);
function Increment(){
count.value ++;
}
onMounted(()=>{
})
</script>
|
简约写法
是一种语法糖,不用在setup()中显式return,直接在template中{{ }}调用就行,但是就不能组合式与选项式混写,只能组合式
组合式与选项式的区别
响应式
组合式
1
2
3
4
5
6
7
8
9
10
11
12
13
14
15
| <template>
<h3>{{ message }}</h3><br>
<h3>{{ obj.name }}</h3>
</template>
<script setup>
import { reactive, ref } from 'vue';
const message=ref("Com~");
const obj = reactive({
name:"jellycat",
message:message
})
</script>
|

选项式
1
2
3
4
5
6
7
8
9
10
11
12
13
| <template>
<h3>{{ message }}</h3><br>
</template>
<script>
export default{
data(){
return{
message:"Options!"
}
}
}
</script>
|
计算属性
组合式
1
2
3
4
5
6
7
8
9
10
11
12
13
14
| <template>
<h3>Com-reverse:{{ res }}</h3>
</template>
<script setup>
import { ref,computed } from 'vue';
const message = ref("Hello World!");
const res = computed(() =>{
return message.value.split("").reverse().join('');
})
</script>
|

优势:可以把内容单独拆到一个文件中
eg:
1
2
3
4
5
6
7
8
| import { computed } from 'vue';
export function MyDemo(message) {
const demo = computed(() => {
return message.value + "114514";
})
return demo
}
|
1
2
3
4
5
6
7
8
9
10
11
12
13
14
15
16
17
18
| <template>
<h3>Com-reverse:{{ res }}</h3>
<h3>demo:{{ res1 }}</h3>
</template>
<script setup>
import { ref,computed } from 'vue';
import {MyDemo} from './Comcomputedsingle'
const message = ref("Hello World!");
const res = computed(() =>{
return message.value.split("").reverse().join('');
})
const res1 = MyDemo(message);
</script>
|
选项式
1
2
3
4
5
6
7
8
9
10
11
12
13
14
15
16
17
18
| <template>
<h3>Opt-Reverse:{{ Fliter }}</h3>
</template>
<script>
export default{
data(){
return {
message:"Hello World!"
}
},
computed:{
Fliter(){
return this.message.split("").reverse().join();
}
}
}
</script>
|
组合式API_事件处理
1
2
3
4
5
6
7
8
9
10
11
12
13
14
15
16
17
18
19
20
21
22
23
24
25
26
27
28
29
30
31
32
| <template>
<button @click="Increment">选项式API:Count = {{ count }}</button><br>
</template>
<script>
export default{
data(){
return{
count:0
}
},
methods:{
Increment(){
this.count++
}
}
}
</script>
<template>
<button @click="Increment">组合式API: count = {{ count }}</button>
</template>
<script setup>
import {ref} from 'vue'
const count = ref(0);
function Increment(){
count.value++;
}
</script>
|
组合式API_侦听器

1
2
3
4
5
6
7
8
9
10
11
12
13
14
15
16
17
18
19
20
21
22
23
24
| <template>
<button @click="Increment">{{ count }}</button>
</template>
<script>
export default{
data(){
return{
count:0
}
},
methods:{
Increment(){
this.count++
}
},
watch:{
count(OldValue,NewValue){
console.log(OldValue,NewValue);
}
}
}
</script>
|
1
2
3
4
5
6
7
8
9
10
11
12
13
14
15
16
| <template>
<button @click="Increment">{{ count }}</button>
</template>
<script setup>
import {ref,watch} from 'vue'
count = ref(0);
function Increment(){
count.value++
};
watch(count,(OldValue,NewValue) => {
console.log(OldValue,NewValue);
})
</script>
|
将侦听器放到单独一个文件中
1
2
3
4
5
6
7
8
| import {watch} from 'vue'
export function Watcher(count){
watch(count,(OldValue,NewValue) => {
console.log(OldValue,NewValue);
})
}
|
注意:watch监听时,ref对象不需要.value
组合式API_生命周期
1
2
3
4
5
6
7
8
9
10
11
12
13
14
15
16
17
18
19
20
21
22
23
24
25
26
27
28
29
30
31
32
33
34
|
<template>
</template>
<script>
export default{
beforeCreate(){
},
created(){
},
beforeMount(){
},
mounted(){
},
beforeUpdate(){
},
updated(){
},
beforeUnmount(){
},
unmounted(){
}
}
</script>
|
1
2
3
4
5
6
7
8
9
10
11
12
13
14
15
16
|
<template>
</template>
<script>
import { onMounted, onUpdated } from 'vue'
onMounted(() => {
}),
onUpdated(() => {
})
</script>
|
组合式API_模板引用
1
2
3
4
5
6
7
8
9
10
11
|
<template>
<h3 ref="message">Opt</h3>
</template>
<script>
export default{
mounted(){
this.$refs.message.innerHTML='OOOppt';
}
}
</script>
|
1
2
3
4
5
6
7
8
9
10
11
12
13
14
15
|
<template>
<h3 ref="message">Com</h3>
</template>
<script setup>
import {ref,onMounted} from 'vue'
const message = ref(null);
onMounted(()=>{
message.value.innerHTML = 'CCCOOM';
})
</script>
|
组合式API_Props
1
2
3
4
5
6
7
8
9
10
11
12
13
14
15
16
17
18
19
20
21
22
23
24
25
26
27
28
29
|
<template>
<OptChild msg="114514" />
</template>
<script>
import OptChild from './OptChild.vue'
export default{
components:{
OptChild,
}
}
</script>
<template>
<p>{{ msg }}</p>
</template>
<script>
export default {
props: {
msg: {
type: String,
default: ""
},
}
}
</script>
|
1
2
3
4
5
6
7
8
9
10
11
12
13
14
15
16
17
18
19
20
21
22
23
|
<template>
<ComChild msg="1919810"/>
</template>
<script setup>
import ComChild from './ComChild.vue';
</script>
<template>
<p>{{ msg }}</p>
</template>
<script setup>
defineProps({
msg:{
type:String,
default:""
},
});
</script>
|
组合式API_事件
1
2
3
4
5
6
7
8
9
10
11
12
13
14
15
16
17
18
19
20
21
22
23
24
25
26
27
28
29
30
31
32
33
34
35
36
37
38
39
40
41
42
43
|
<template>
<button @click="sendMsg">发送数据</button>
</template>
<script>
export default {
data(){
return{
message:"114514"
}
},
methods:{
sendMsg(){
this.$emit('OnEvent',this.message);
}
}
}
</script>
<template>
<OptChild @onSomeEvent="acpt" />
<p>接收数据:{{ message }}</p>
</template>
<script>
import OptChild from './OptChild.vue';
export default{
components:{
OptChild,
},
data(){
return{
message:""
}
},
methods:{
acpt(data){
this.message = data;
}
}
}
</script>
|
1
2
3
4
5
6
7
8
9
10
11
12
13
14
15
16
17
18
19
20
21
22
23
24
25
26
27
28
29
30
31
32
33
|
<template>
<ComChild @onEvent="getMsg" />
<p>收到数据{{ message }}</p>
</template>
<script setup>
import ComChild from './ComChild.vue';
import {ref} from 'vue'
const message = ref("");
function getMsg(data){
message.value = data;
}
</script>
<template>
<button @click="sendMsg">获取数据</button>
</template>
<script setup>
import {ref} from 'vue'
const message = ref("1919810");
const emit = defineEmits(["onEvent"]);
function sendMsg(){
emit("onEvent",message.value);
}
</script>
|
自定义指令
选项式
1
2
3
4
5
6
7
8
9
10
11
12
13
14
15
16
17
18
19
20
| <template>
<h3 v-jellycat>hello world</h3>
</template>
<script>
export default{
directives:{
jellycat:{
mounted(element){
console.log(element);
}
}
}
}
</script>
|
组合式
1
2
3
4
5
6
7
8
9
10
11
12
13
14
15
| <template>
<span v-jellycat>hello</span>
</template>
<script setup>
const vJellycat = {
mounted:(element) => {
console.log(element);
}
}
</script>
|
全局与局部自定义指令

局部
1
2
3
4
5
6
7
8
9
10
11
| <template>
<h3 v-scp>Scoped</h3>
</template>
<script setup>
const vScp = {
mounted(element){
element.style.color = "green"
}
}
</script>
|
全局
需要在main.js中创建自定义指令
1
2
3
4
5
6
7
8
9
10
11
12
13
|
import './assets/main.css'
import { createApp } from 'vue'
import App from './App.vue'
const app = createApp(App);
app.directive("glb",(Element) => {
Element.style.color = "blue"
})
app.mount('#app')
|
自定义指令的钩子函数

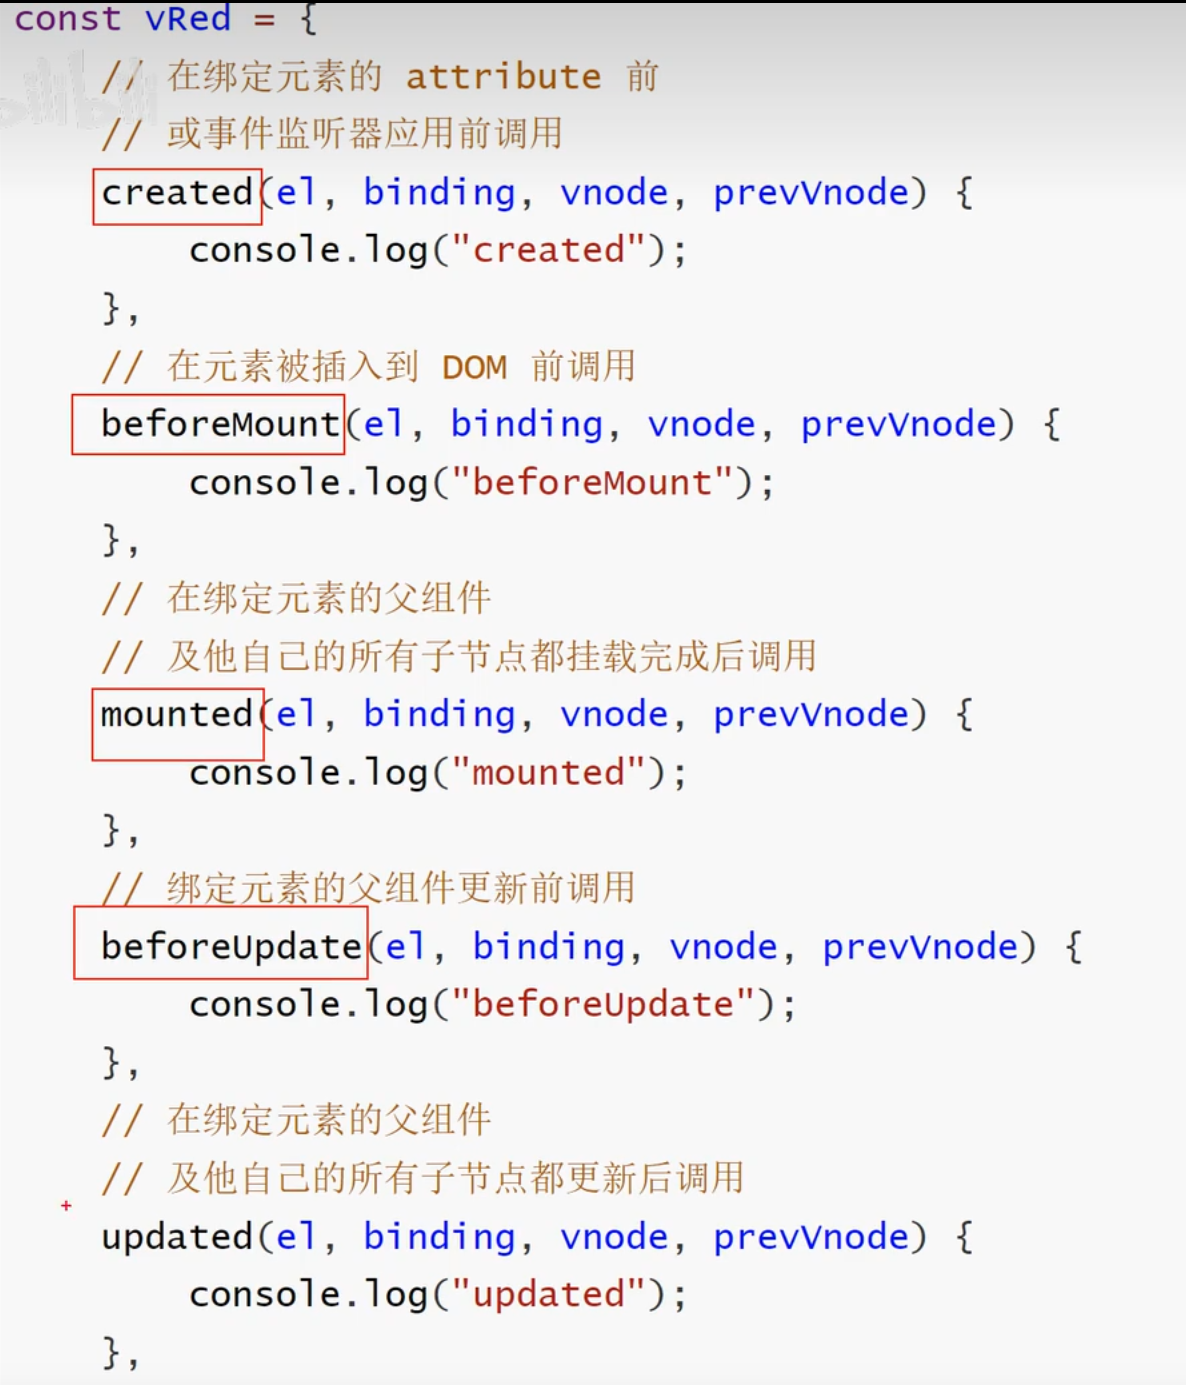

参数
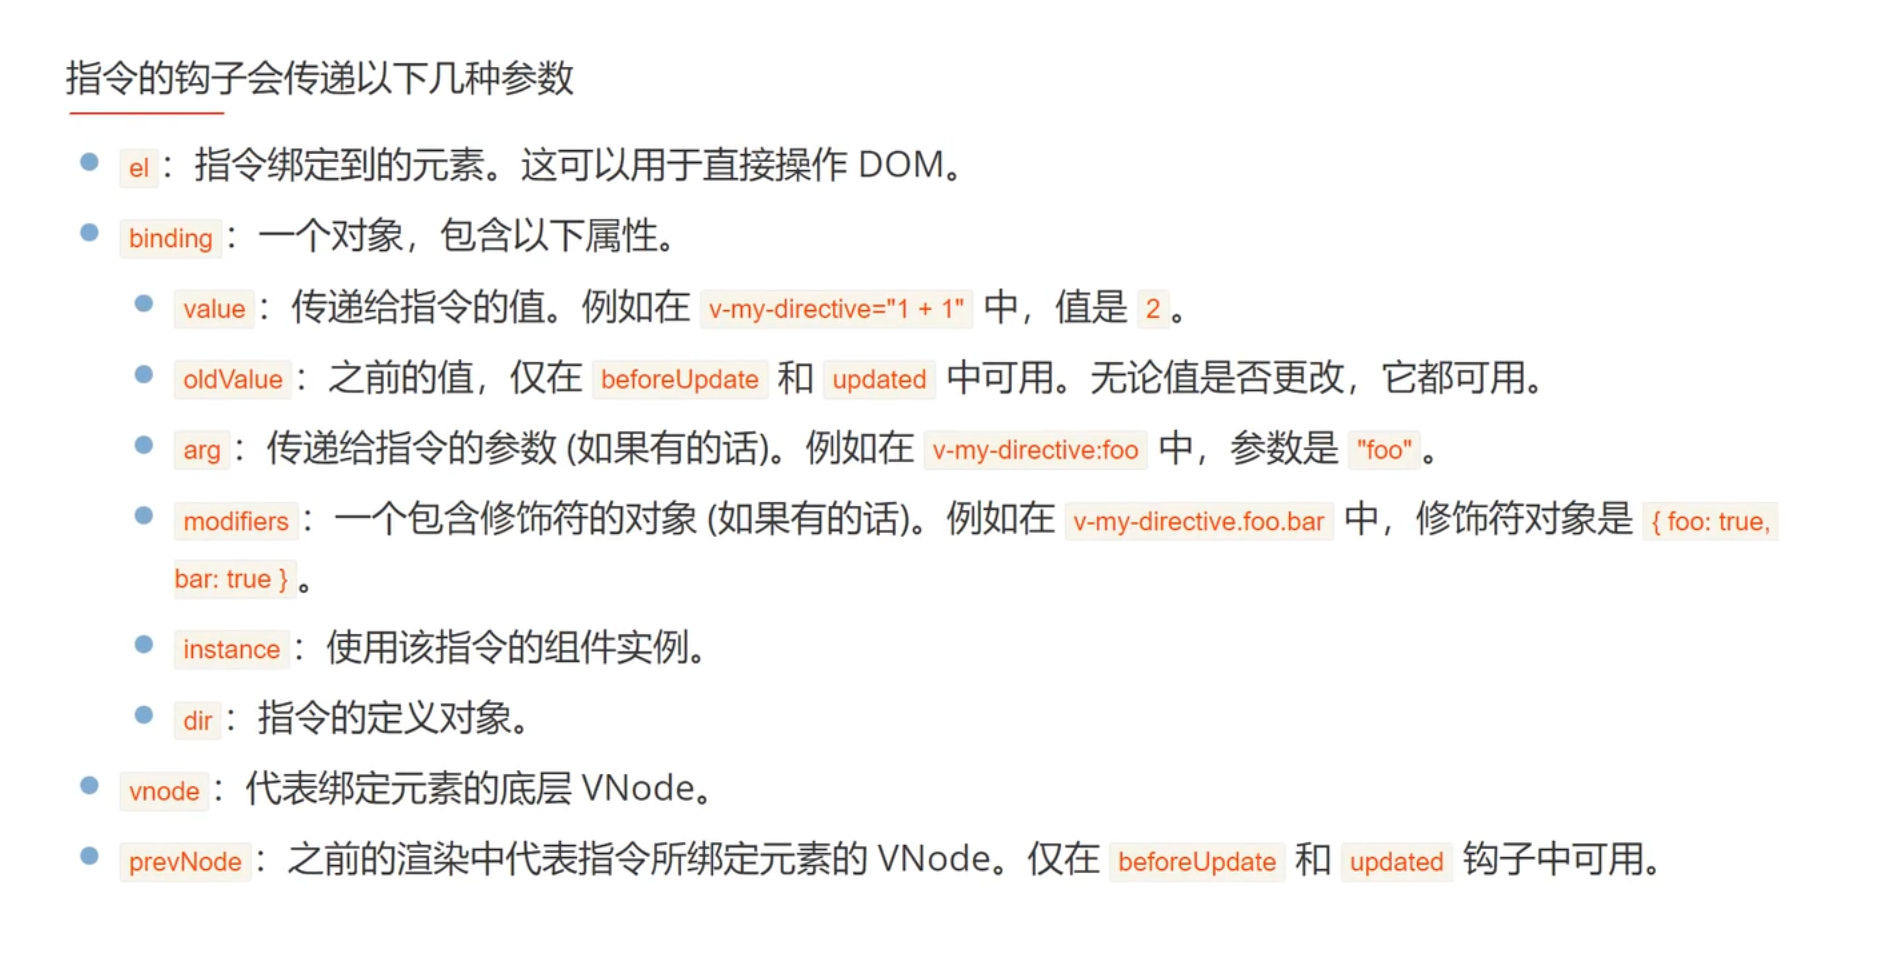
eg.模拟v-show
1
2
3
4
5
6
7
8
9
10
11
12
13
14
15
16
17
| <template>
<p v-myShow="true">11</p>
</template>
<script setup>
import {ref} from 'vue'
const flag = ref(true)
const vMyShow = {
mounted(el,binding,vNode,prevNode){
if(binding.value){
el.style.display = 'block';
}else{
el.style.display = 'none';
}
}
}
</script>
|


